
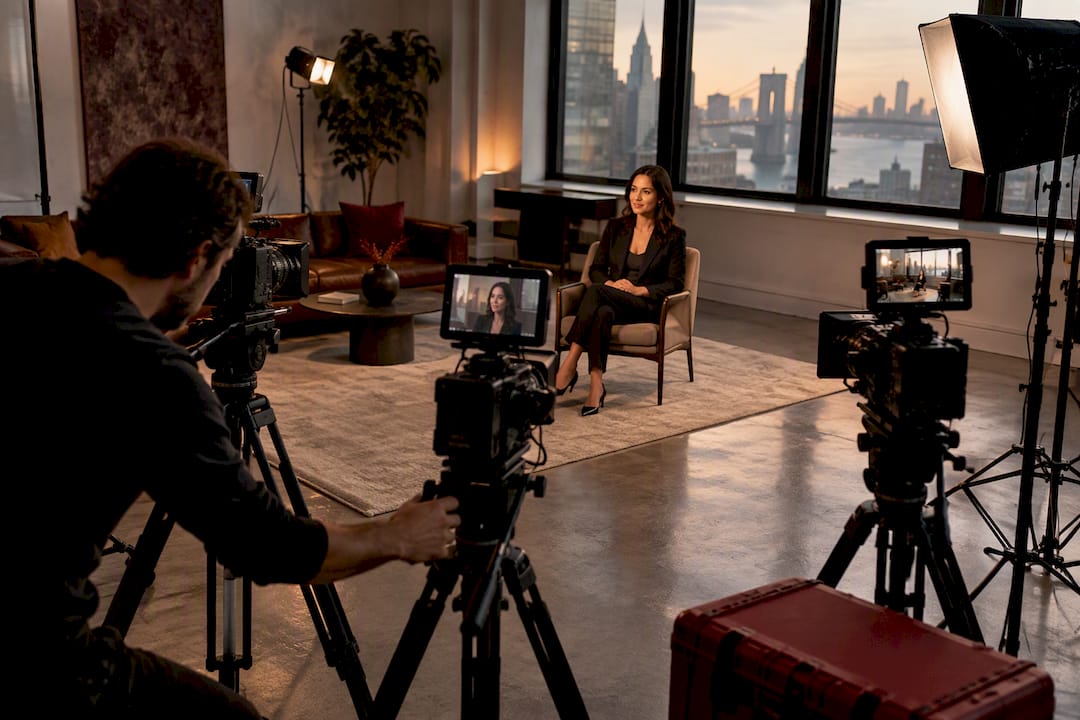
A reliable multi camera interview setup means two matched cameras plus a wide or master angle, dual-channel lavs with a backup, consistent three-point lighting, and a slate check before anyone hits record. The single most important preflight test is a 30-second dual-audio, dual-exposure roll with both people talking at normal volume, that short test catches white balance mismatches, RF interference, and clipped audio before they cost you a whole afternoon of reshoots.
TL;DR:
- Matching white balance on each camera using a gray card prevents color mismatches that become obvious during editing and are difficult to fix later.
- A preflight 30-second audio and exposure test at normal speaking volume is essential to detect RF interference, white balance issues, and audio clipping.
- Lighting should be designed to work from every camera angle, with key, fill, and background lights carefully placed and color-matched to avoid color casts and spill.
- Using a slate at the start of each take provides a reliable sync point, especially when timecode sync is unreliable across different gear brands.
Table of Contents
- What Gear Do You Actually Need for a Multi Camera Interview Setup?
- How Should Lighting Work Across Multiple Camera Angles?
- What’s the Right Audio Setup for a Two-Person Interview?
- What Should Be on Your Preproduction Checklist?
- How Do You Run a Clean Multicam Shoot Day?
- How Do You Sync and Edit Multicam Interview Footage?
- What I’ve Learned Running Multicam Interviews for Thirty Years
- How Ken Jones Photography Handles Interview Video Production
- Sources
- FAQ
What Gear Do You Actually Need for a Multi Camera Interview Setup?
Most professional interview setups run three roles: A-camera, B-camera, and an optional wide or master. A-camera holds the main medium shot on your primary subject, B-camera grabs the reverse or a tighter angle, and the wide establishes room geography and gives editors a safety cut when something goes wrong on A or B. This three-role structure is close to the standard professional setup I’ve used on hundreds of corporate and editorial interview shoots.
Maintain a comfortable angle separation between A and B cameras to ensure smooth editing transitions and avoid jarring cuts, which can make a two-camera edit look unprofessional. For lens choices, a 35mm to 50mm range works well for wider two-shots, while 70mm to 85mm equivalents flatter close-ups without distorting features. Open your aperture enough to separate subject from background, but not so wide that you lose focus tolerance when someone leans forward mid-answer.
Before rolling, match every camera on:
- Frame rate (pick one and stick to it across all bodies)
- Shutter speed, typically 1/50 at 24fps for that expected cinematic motion blur
- White balance, ideally set off a gray card on each camera individually
- Picture profile, set to the flattest common setting your cameras share
Don’t count on genlock or timecode syncing across mixed camera brands. It rarely holds up on lower-end or hybrid rigs, so plan on a slate as your backup regardless.
How Should Lighting Work Across Multiple Camera Angles?
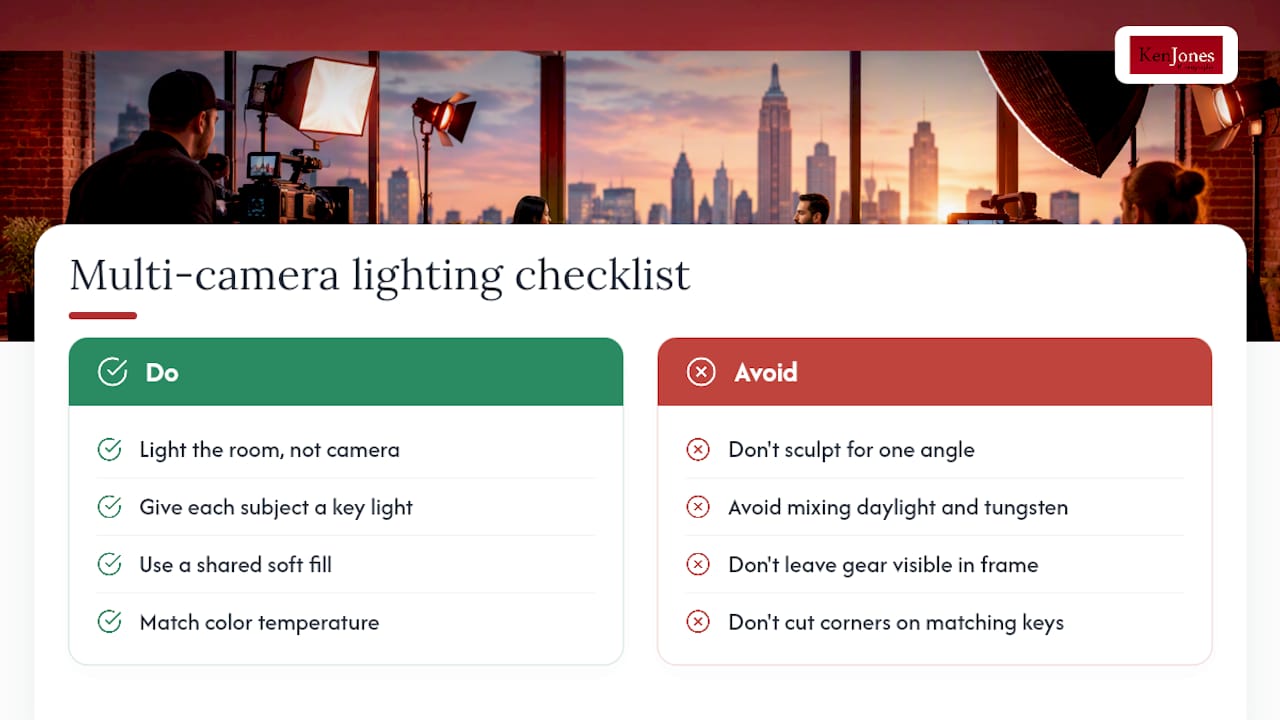
Light the room, not the camera. A single-camera setup lets you sculpt light for one angle and forget the rest. Multicam takes that away. Multi-camera setups trade sculpted single-angle lighting for a system that has to hold up from every direction you’re shooting, and that means more stands, more careful placement, and more testing.
Start with a key light for each subject, a shared soft fill to keep shadows workable on both faces, and a background separation light to add depth without blowing out the wall behind your talent. Match color temperature across every fixture. Mixing daylight-balanced LEDs with tungsten practicals in the background is a classic rookie mistake that shows up as a color cast the moment you cut to the wide.
Pro Tip: Walk to each camera position before talent arrives and look through the viewfinder. If you can see a C-stand, a cable run, or your key light’s housing in the frame, flag it, move it, or accept that angle can’t be used for that shot.
Use C-stands, flags, and short booms to keep gear out of alternate frames and to control spill. Basic multi-camera lighting rules call for exactly this kind of compromise, and it’s worth the extra ten minutes of setup. If space or gear is limited, prioritize matching key light quality across both subjects first. A slightly uneven background is forgivable. Mismatched faces are not.
What’s the Right Audio Setup for a Two-Person Interview?
Audio failures kill more interview footage than bad lighting ever will, because you usually can’t fix them after the fact. Run one lav per subject, feeding into a dedicated channel each, and record a backup either on a separate recorder or as a redundant track on camera. If your subjects are comfortable with it, add a boom overhead as a third safety source, especially for wider shots where lav placement gets tricky under clothing.
- Route each lav to its own isolated channel. Never mix two voices onto one track.
- Enable dual-channel or backup recording on your wireless system if it supports it.
- Run a 30-second pre-roll with both people talking at normal volume, watching your meters and listening on headphones the whole time.
- Scan for RF interference during that same pre-roll, particularly in buildings with heavy Wi-Fi traffic, which is most Manhattan office spaces.
- If timecode or genlock isn’t syncing reliably, fall back on a clap slate at the head of every take.
That pre-roll test matters more than any other single step in this process. A short, honest test with real speech at real volume will expose problems a five-second level check never will.
What Should Be on Your Preproduction Checklist?
A tight preflight checklist prevents ninety percent of the on-set scrambling I still see on other people’s productions.
- Mark and protect your 180-degree line with tape on the floor before anyone sets a light.
- Check backgrounds through every camera, not just the one you’re standing behind.
- Label camera media and audio channels before the first take, not after the third.
- Confirm your slate and clap routine with everyone on set, including talent.
- Verify batteries, cards, and a backup drive are packed and charged.
- Assign roles clearly, even on a two-person crew: one person runs cameras, one runs audio and slate.
Detailed preproduction planning around media naming and equipment testing consistently saves the most time in post. For a two-camera studio interview, budget 45 minutes for lighting and camera setup, 15 minutes for audio and slate tests, and a real 10-minute rehearsal with stand-ins before your actual subject sits down. Our internal studio rental equipment checklist walks through the same process in more detail if you’re renting space for the day.
How Do You Run a Clean Multicam Shoot Day?
Before you roll on the real take, check exposure and focus on every camera, confirm audio levels are reading properly on both channels, and get your slate on record. Only then call action. Keep an eye on backup recorders throughout, not just at the start, since a dying battery or a full card fails silently.
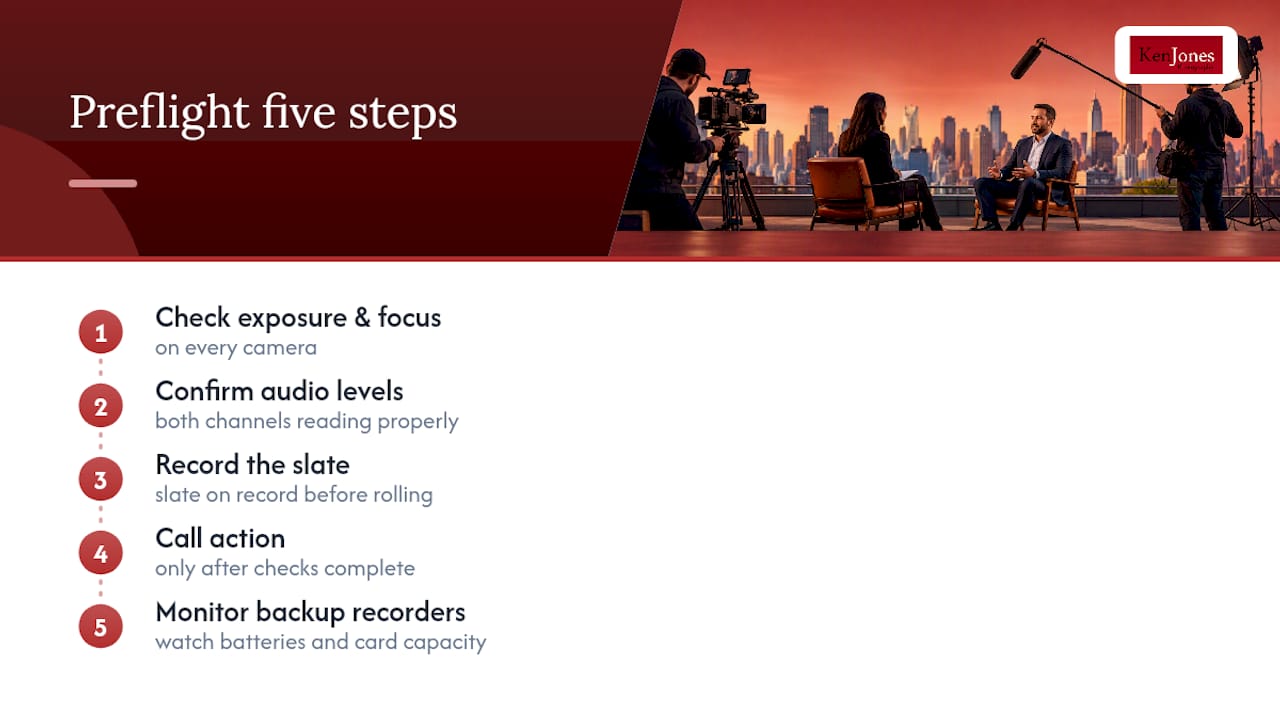
Watch your talent’s eyelines during the interview and catch it fast if someone drifts off-axis after a break. Flicker from mismatched LED frequencies, slow focus drift on longer lenses, and background plane noise are the three problems that show up most often, and all three are easier to catch live than to fix in the edit.
On one location shoot years ago, I had a subject shift seats slightly after a bathroom break, throwing off the eyeline match to the B-camera. We caught it on the monitor before the next question and repositioned. Nobody watching the final cut ever knew.
How Do You Sync and Edit Multicam Interview Footage?
Treat the clap slate as your sync anchor, not your timecode. On indie and mixed-gear rigs, manual slating beats unlocked timecode nearly every time, since even small clock drift compounds over a long interview.
Once footage is in, sync your ISO camera files and audio in a multicam sequence inside Premiere Pro, DaVinci Resolve, or Final Cut Pro, using the audio waveform or the slate clap as your alignment point. Keep every camera’s raw ISO file intact rather than committing to a single live-switched line cut. Editors depend on isolated camera files because a moment missed on the live switch can still be rebuilt from the untouched source later.
- Name folders by camera and date before footage leaves the card.
- Estimate storage generously. A two-camera 4K interview day can easily clear several hundred gigabytes.
- If picture profiles didn’t match on set, apply a quick color match using your wide shot as a reference before fine-tuning grades.
What I’ve Learned Running Multicam Interviews for Thirty Years
I once had a producer swear the white balance matched across both cameras because they “looked the same” on the small monitors. It wasn’t until the edit that we saw one camera reading noticeably warmer than the other, and by then the subject had left the building. Now I white balance off a gray card on every single body, every single time, no exceptions.
Three rules I never skip: run the preflight audio and exposure test before talent sits down, physically walk each camera position to flag or hide gear that would show in an alternate frame, and always record an audio backup even when the primary system feels bulletproof. At FultonStudio, a typical studio interview day runs in blocks: setup and lighting first, a full camera and audio test second, then the interview itself, with a buffer built in for a wardrobe change or a re-slate if something needs a second pass. Clients get a clear sense of what they’ll walk away with before we ever roll.
— Ken
How Ken Jones Photography Handles Interview Video Production
Most creators can run a solid two-camera interview with a weekend of practice and this checklist taped to the wall. Where it gets harder is scale: a full crew day, a Manhattan studio with proper grip support, or a shoot where the client needs a fast, polished turnaround with no room for a lighting mismatch discovered in the edit bay. That’s the gap a full-service NYC photography studio fills.

The studio’s corporate interview video production services cover camera and lighting setup, sound, crew, and post, so you’re not troubleshooting RF interference solo an hour before your subject arrives. If you’re weighing whether to DIY or hire out, it usually comes down to reuse and audience: a one-off internal clip for a small team is a fine DIY project, but a piece going on your homepage, in a campaign, or in front of press deserves a crew that’s matched cameras thousands of times. Reach out through Kenjonesnyc to check availability and talk through your next interview shoot.
Sources
For camera matching and background technique, see the interview lighting setup guide and the sourced references throughout this article.
- Multiple-camera setup — Wikipedia
- Syncing audio with video — Vassar
- How to nail multi-camera interviews as a solo operator — B&H Explora
- Multiple camera interviews: basic rules — StudentFilmmakers
FAQ
How Do I Set Up Two Cameras for an Interview?
Position A-camera on a medium shot of your main subject and B-camera at least 30 degrees away for a reverse or tighter angle, then match frame rate, shutter speed, and white balance across both before recording. Run a slate clap at the start of each take since manual slating outperforms unlocked timecode on most indie rigs.
How Do You Create a Multicam Source Sequence?
Import synced ISO files from each camera into Premiere Pro, Resolve, or Final Cut Pro, then group them using the audio waveform or slate clap as the alignment point before building a multicam sequence. This lets you switch angles live in the timeline while keeping every original camera file intact for rescue edits.
Can I Record With Both a Front and Back Camera Simultaneously?
Most smartphones and consumer camera apps can’t natively record front and back sensors at once for a true dual-angle interview, so professional setups rely on two separate camera bodies instead. Two matched external cameras give you far more control over framing, exposure, and lens choice than any single dual-lens phone feature.
What’s the Best Lighting Setup for a Two-Person Interview?
A three-point system with a key light on each subject, a shared soft fill, and a background separation light works across most camera angles without needing separate rigs per camera. Multi-camera lighting requires this kind of compromise since every angle has to hold up, not just the one you’re standing behind.