
For interview headshots, keep talent 6 to 10 feet from the green screen, light the backdrop and subject as two separate jobs, and lock every camera setting before you roll. Get those three things right and the key comes out clean with minimal spill and a composite nobody questions. Everything else in this guide (materials, wardrobe, audio, post) exists to protect that one setup.
TL;DR:
- Position talent between 6 and 10 feet from the green screen to minimize spill and allow effective lighting, with 6 to 8 feet being ideal for headshots.
- Separate lighting for the background and subject is crucial, with the backdrop lit evenly at 45 degrees before lighting the talent to prevent green spill and halo effects.
- Lock all camera settings, including exposure, white balance, and focus, to ensure consistent framing and clean keying in post-production.
- Use high-quality, controlled lighting with soft LED panels, flags, and grids to prevent spill and bounce, along with careful wardrobe choices that avoid green or reflective materials.
- In tight spaces, compensate with a smaller screen, diffusion, darker background walls, and flags to ensure proper focus and reduce shadows or spill.
Table of Contents
- Green Screen Interview Setup: Distances and Studio Layout
- Green Screen Lighting: Two Separate Jobs, Not One
- Camera Settings for a Clean Green Screen Key
- Green Screen Materials: Fabric, Paper, or Painted Wall
- Wardrobe and Reflective Items: What Kills a Good Key
- Shooting Workflow: Blocking, Eyelines, and Pre-Roll Checks
- Post-Production Basics: Keying Tools and Quick Fixes
- Troubleshooting Green Screen Interview Problems
- Studio-Tested Notes and Production Lessons From Ken Jones
- Managing Shadows and Spill Beyond Lighting Alone
- Microphone and Audio Setup for Green Screen Interviews
- Software for Editing Green Screen Footage
- When to DIY and When to Bring in a Studio
- Book a Green Screen Interview Shoot in NYC
- Sources
- FAQ
Green Screen Interview Setup: Distances and Studio Layout
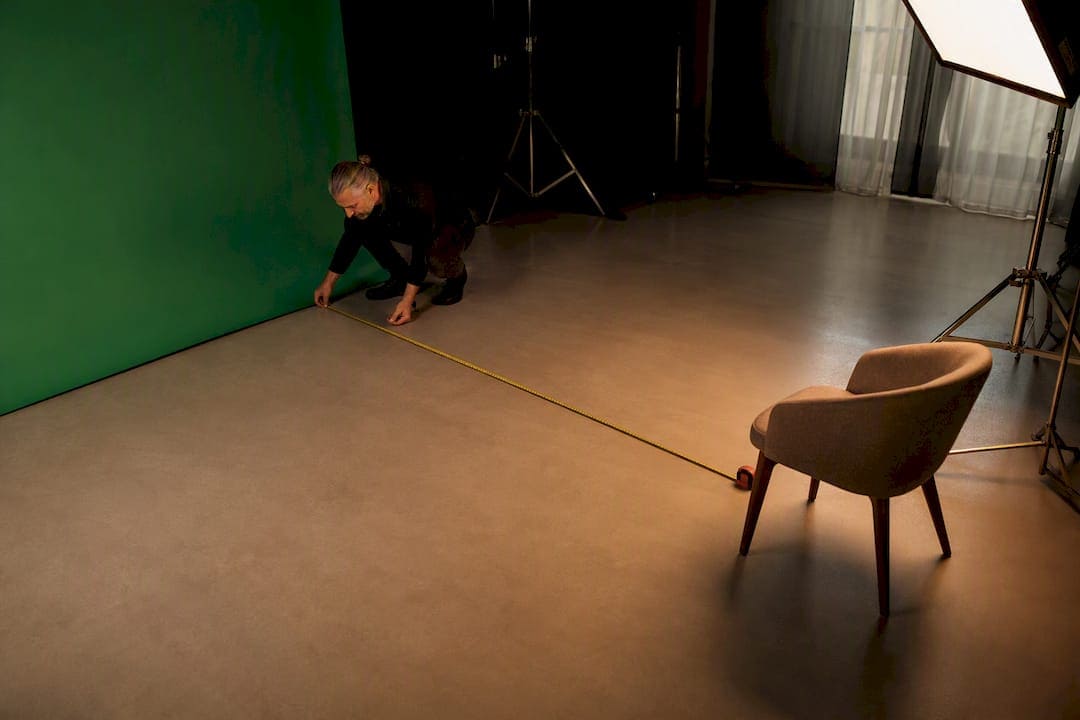
Distance is the cheapest fix in this entire process, and most people skip it because the room feels too small. Position your interview subject 6 to 10 feet (1.8 to 3 meters) from the screen, with 6 to 8 feet being the sweet spot for a standard headshot or half-body interview frame according to the Vibbit green screen guide. That gap gives green light room to fall off before it bounces onto skin, hair, and clothing, and it gives you space to light the subject without your key light spilling onto the backdrop.
Think of your studio floor as two zones, not one continuous set. The Mediagear approach to studio setup treats the background and the subject as separate lighting problems that happen to share a frame, and that mental split is the difference between a clean composite and hours of rotoscoping. A standard headshot backdrop runs about 6 feet wide by 5 feet tall, which is plenty for a seated or standing single subject if your framing is reasonably tight.
Camera placement matters too. A slightly longer focal length compresses the frame and lets you back the camera off, which keeps the subject from feeling pushed into the screen and gives a more flattering, less distorted face. In cramped spaces (and I’ve shot in plenty of NYC apartments and tight conference rooms doing this), you compensate with:
- A smaller screen and tighter crop that only needs to cover the actual frame edges
- Extra diffusion close to the subject to keep shadows soft in a shallow room
- A darker, matte-finished wall behind the rig to kill secondary bounce
- Flags between the subject and any side walls that aren’t part of your set
If you can’t hit 6 feet, you can still get a usable key. You just lose margin for error everywhere else, which means your lighting and camera settings need to be closer to perfect.
Green Screen Lighting: Two Separate Jobs, Not One
The single biggest mistake I see on green screen shoots, corporate or independent, is treating background and subject lighting as one lighting setup. They’re not. They’re two jobs that happen to overlap in the same room.
Light the backdrop first, before you touch the talent. Use broad, matched fixtures positioned at roughly 45 degrees on each side of the screen, and check the result on a waveform monitor or your camera’s exposure tools before moving on, a method Mediagear uses on every setup because eyeballing evenness on a small screen lies to you constantly. You want the backdrop slightly less bright than your subject, which helps keep the green from overpowering everything and creating a halo effect around edges during the key.
Here’s a lighting sequence that works on almost every interview setup I run:
- Light the screen evenly with two matched sources at 45 degrees, checking corners and center for hotspots.
- Confirm evenness on a monitor, not by eye, walking the frame edge to edge.
- Bring in your key light for the subject, positioned to shape the face without throwing extra light onto the backdrop.
- Add fill to soften shadows on the far side of the face.
- Add a hair or rim light behind and slightly above the subject to separate them from the background and reduce the green bounce that collects on shoulders and hair.
That rim light does double duty. Beyond the visual separation, it helps neutralize color contamination on hair and shoulder lines that otherwise turn into a mess for the editor pulling the key, a point the StudioBinder lighting guide makes well.
For gear, large soft LED panels give you even, controllable light with less heat than older fluorescent banks, and they’re what most working studios have moved to. Grids and flags matter more than people think here: a grid on your key light keeps it from splashing onto the backdrop, and a flag between your fill and the screen stops secondary bounce you didn’t even know was happening. If you’re working on a tight budget, a pair of matched work-light LEDs with diffusion gel and two cheap flags will get you further than one expensive light used carelessly.
Pro Tip: Walk your own set before the talent arrives. Stand where they’ll stand, look at the monitor, and check for green reflecting off your forehead. If you can see it, the camera will pick up even more.
Camera Settings for a Clean Green Screen Key
Your camera settings decide how much work your editor does later, and this is the section people rush through because manual mode feels fussy on a deadline.
Shoot fully manual. Lock exposure, lock white balance, and if your camera allows it, disable autofocus once you’ve nailed focus on the subject’s eyes. Any of those settings drifting mid-interview creates color shifts between takes that make continuous keying nearly impossible.
For color data, aim for 10-bit 4:2:2 chroma subsampling or better, since that extra color information gives editors real room to pull a clean edge instead of fighting compression artifacts, a distinction Haivision breaks down clearly. Pair that with a low-compression codec like ProRes or DNxHR if your camera or external recorder supports it. An 8-bit, heavily compressed file might look fine on a monitor and still fall apart the moment someone tries to key it.
Other settings to lock in before you roll:
- Shutter speed around 1/80 to 1/100 second, which cuts motion blur and produces cleaner edges, per CyberLink’s setup guidance
- Aperture around f/4 to f/5.6 for enough depth of field to keep the whole face sharp without going so wide it introduces distortion
- ISO at your camera’s native base setting to avoid added noise, which the keyer reads as false detail along edges
- A tripod, locked down, unless the shot specifically calls for movement
Use waveform, false color, or zebra tools to confirm the backdrop reads evenly and the subject’s skin tones sit in a proper exposure range. A field monitor with these tools built in costs less than reshooting an interview, and that’s the honest math on it.
Green Screen Materials: Fabric, Paper, or Painted Wall
Every material has a trade-off, and the “best” one depends on how often you’re shooting and how much storage space you have.
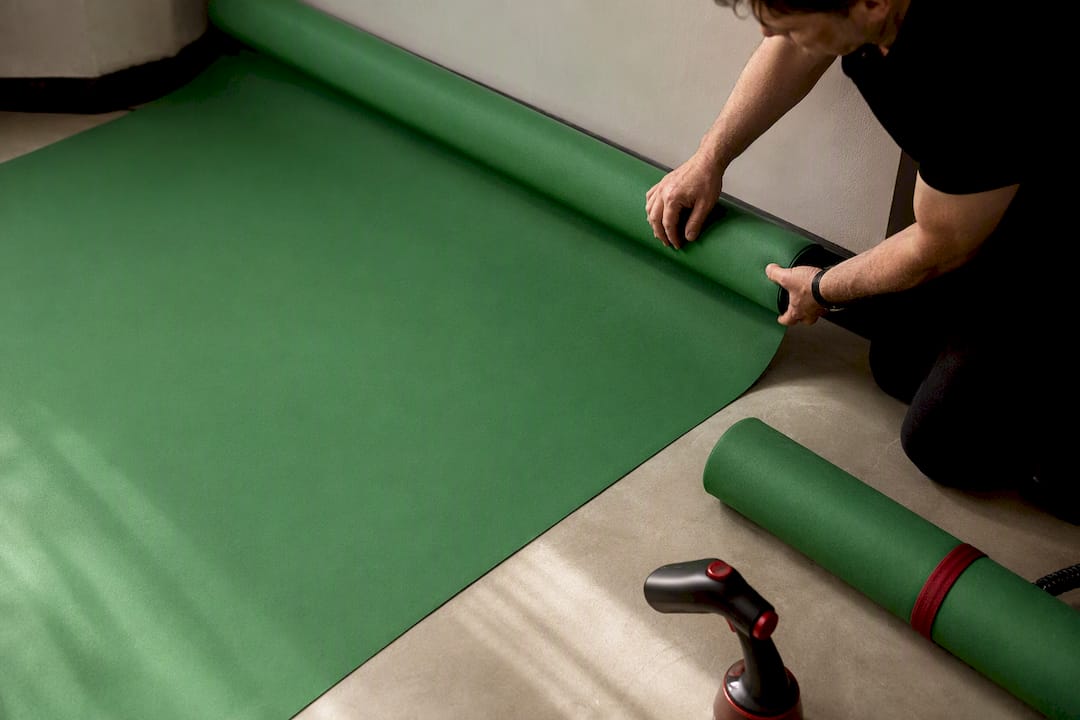
- Muslin or velour fabric travels well and rolls up for storage, but it wrinkles fast, and wrinkles create tiny shadow lines that read as uneven green in the key.
- Paper roll backdrops give the cleanest, most consistent surface for a single session, but they tear, crease at the base, and need replacing more often than fabric.
- Painted walls deliver the most consistent color over time since there’s nothing to wrinkle or sag, which is part of why we built a dedicated cyc wall into our own setup rather than relying on rolled backdrops for every shoot.
Whatever material you use, tension matters more than most people realize. Clamp fabric tight at all four corners and along the top rail, and use C-stands with sandbags to keep the whole rig from shifting mid-shoot. Keep seams out of frame entirely; a visible seam line becomes a visible line in your key no matter how good your lighting is.
If your subject is full-body or moving, extend the screen across the floor (often called a garbage matte setup) so there’s no visible transition line where wall meets ground. Store fabric backdrops clean and fully rolled, never folded, since fold creases can take multiple steamings to remove and sometimes never fully release. Check your green’s color consistency periodically too; sun-faded or heavily washed fabric drifts toward a duller green that’s harder to key against skin tones.
Wardrobe and Reflective Items: What Kills a Good Key
Wardrobe mistakes are the fastest way to sabotage a lighting setup you spent an hour getting right, and they’re entirely avoidable with a two-minute check before you roll.
- Avoid green and green-adjacent tones entirely, including olive and some yellows under certain lighting, since they invite the keyer to punch holes straight through clothing.
- Skip fine patterns like herringbone or tight stripes; they shimmer and create moiré that confuses the key.
- Avoid highly reflective fabrics (satin, sequins, glossy vinyl) that pick up and bounce green light back at the camera.
- Use matte makeup rather than dewy or shiny finishes, and tame flyaway hairs, since both catch and reflect stray green light.
- Glasses need an anti-glare check under your specific lighting angle; jewelry should be simple enough that it doesn’t create hot reflective points.
Pro Tip: Run a 15-second test clip before the real interview starts and actually pull a rough key on a laptop if you can. It takes two minutes and catches problems that are invisible on a small camera monitor but obvious once keyed. For deeper wardrobe guidance built specifically for interview shoots, our wardrobe guide for video interviews covers fabric and color choices in more detail.
Shooting Workflow: Blocking, Eyelines, and Pre-Roll Checks
Before the interview starts, block the subject’s movement and rehearse where their eyeline lands, then mark that spot with tape on the floor so every return to that position matches. Small shifts in position change how light falls on the face and how much green bounces onto skin, so consistency here saves real editing time later.
If the camera will move at any point, or you’re planning composite work that needs a clean reference, shoot a clean plate: the same frame with no subject in it. Editors use that plate to patch problem areas that no amount of keying will fix cleanly.
Run this checklist before every take, not just the first one:
- Check the waveform for even backdrop exposure, corner to corner.
- Confirm clean subject-to-background separation with no green bounce visible on skin or hair.
- Verify white balance hasn’t drifted since your last check.
- Confirm frame exposure on the subject sits where you want it, not just the background.
- Double-check you’re recording in the codec and bit depth you planned, not a fallback setting.
Log shot notes as you go: take numbers, any wardrobe adjustments, and whether a clean plate was captured. Handing an editor organized notes alongside footage saves them from guessing, and it saves you a follow-up call three days later asking which take had the good audio.
Post-Production Basics: Keying Tools and Quick Fixes
Good capture makes post-production fast. Bad capture makes it a negotiation with your own footage, and no amount of software cleverness fully closes that gap.
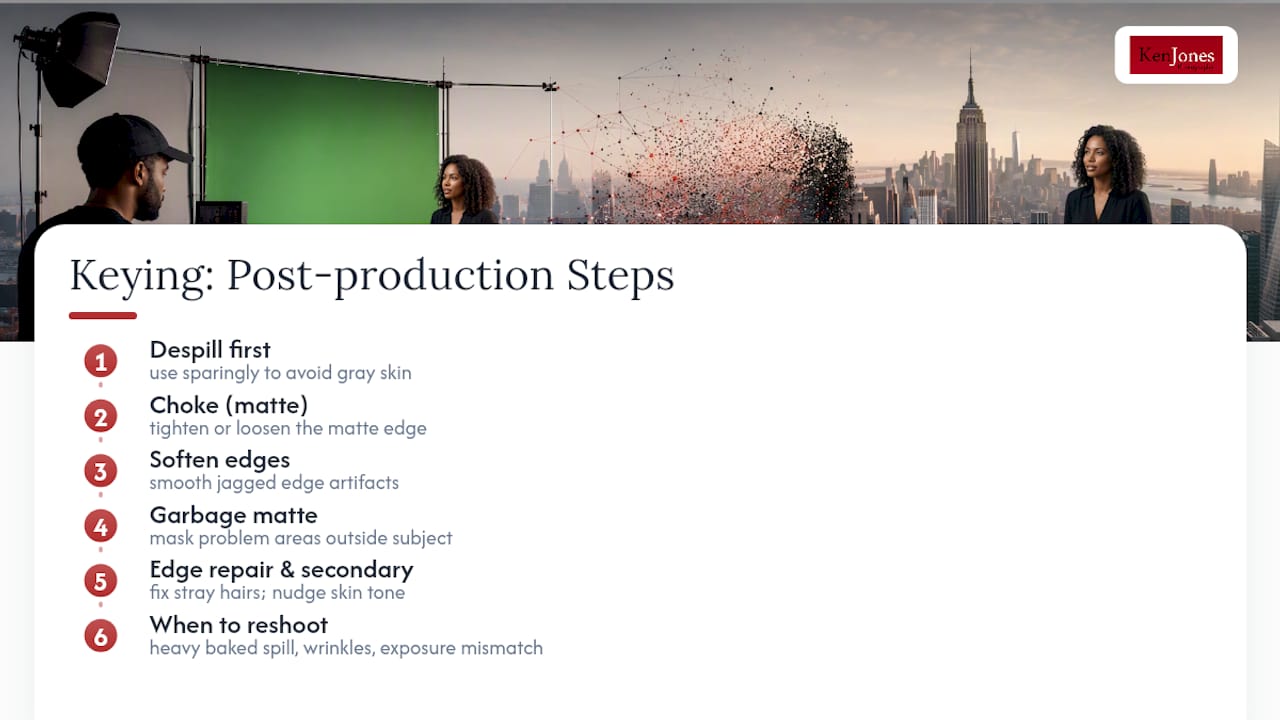
Every keyer, whether it’s a built-in tool or a dedicated plug-in, gives you a similar set of controls: despill (which pulls green color contamination off skin and edges), choke (which tightens or loosens the matte edge), and softening (which smooths jagged edge artifacts). Use despill first and sparingly; overdoing it desaturates skin tones and gives people an unnatural gray cast.
For rougher footage, garbage mattes let you mask out problem areas outside the subject entirely, which removes distractions the keyer would otherwise fight with. Edge repair tools handle stray hairs and soft edges the primary key missed, and secondary color correction can nudge a slightly warm or cool key back toward believable skin tone once it’s composited over the final background. Matching the color temperature and grade of your subject to the new background is its own discipline, and this practical guide to color grading in videography is a solid resource if you want to go deeper there.
Some things are genuinely not fixable in post. Heavy spill baked into skin tone from poor lighting, deep wrinkles in the backdrop that create rolling shadow lines, and inconsistent exposure between takes all cost far more editing time than they’re worth, and sometimes the honest answer is a reshoot. That’s exactly why the Videomaker guide to chroma key frames good keying as three connected disciplines: lighting, shooting, and editing. Weakness in the first two multiplies the workload in the third.
Deliver editors more than just the final take. Include labeled clips (not just “Take 1, Take 2”), any clean plates you shot, and a reference frame of the actual background color under set lighting. That last item alone prevents a lot of back-and-forth about whether a green tint in the final composite came from the key or the grade.
Troubleshooting Green Screen Interview Problems
Most green screen failures trace back to one of three causes: uneven light, wardrobe, or distance, and most have a same-day fix if you catch them before the crew breaks down the set.
- Hotspot on the backdrop: move your background light back slightly and add diffusion rather than powering it down, which often just shifts the hotspot elsewhere.
- Visible spill on skin or hair: increase subject-to-screen distance first, then add or reposition a rim light before touching color in post.
- Reflective clothing catching green: swap wardrobe if you can, or angle the subject slightly away from the strongest background light source.
- Uneven exposure across the frame: recheck your waveform; this usually means one background fixture drifted or dimmed compared to its match.
If a problem shows up on the monitor and persists after two adjustment attempts, stop and reshoot that segment rather than betting on post-production to save it. A five-minute reshoot beats an hour of masking work every time.
Studio-Tested Notes and Production Lessons From Ken Jones
A two-person interview setup taught me this lesson the hard way years ago: two subjects sitting close together at a standard distance produced visible spill along both shoulders where their bodies overlapped near the screen. Pulling them back an extra two feet and adding individual rim lights to each subject solved it completely; the fix cost ten minutes, the original mistake would have cost an editor half a day.
Grip discipline matters more on green screen days than regular shoots. We flag every C-stand with sandbags, tape cable runs flat, and double-check that nothing reflective is sitting just out of frame where it can still bounce light onto the set. Our interview lighting setup guide walks through the full kit list and diagram we use for booked interview sessions, if you want the deeper reference.
Managing Shadows and Spill Beyond Lighting Alone
Lighting solves most spill problems, but a few tricks outside your light kit close the remaining gap. Flags are your quiet workhorses here: a black flag placed just outside the frame between your subject and any bright background light physically blocks bounce before it ever reaches skin or hair, and it costs nothing to add once your lights are set.
Room color matters more than people expect. Painted white walls or a light-colored ceiling near your set will pick up green from the backdrop and rebounce it into your scene from angles you never lit for. Hanging black flags or duvetyne (a heavy black fabric) on nearby surfaces kills that secondary bounce fast, and it’s a five-minute fix that solves problems that would otherwise look like a lighting failure.
Subject positioning inside the two-zone layout also controls shadow behavior. Angling the subject slightly rather than shooting them dead square to the screen changes how shadows fall and can reduce the shadow that prints directly onto the green behind them, which the keyer otherwise reads as a dark, uneven patch. If a shadow persists despite good angle and flagging, check whether your fill light is doing double duty lighting both the subject and part of the backdrop; that overlap is a common hidden cause of shadow-shaped spill that people blame on the wrong light.
Floor reflections deserve a look too, especially in rooms with polished concrete or glossy tile. A simple black floor mat under the subject’s feet, just out of frame, removes ground bounce that no amount of overhead lighting adjustment will fix.
Microphone and Audio Setup for Green Screen Interviews
Clean video with muddy audio still reads as an amateur production, and green screen setups create a few audio wrinkles that a normal interview shoot doesn’t.
Lavalier microphones clipped near the collar are the standard choice for green screen interviews because they stay out of frame and out of the shot’s lighting path, unlike a boom mic that can cast a shadow across your carefully lit backdrop if the operator isn’t careful. If you’re recording two subjects, use two separate lavs on two separate audio channels rather than sharing one mic; it gives your editor far more control when balancing levels afterward.
Room acoustics matter as much as the mic itself. Green screen fabric and paper backdrops don’t absorb sound the way a curtain or acoustic panel does, so a hard-walled room with a green screen can produce more echo than the same room without one. Soft flags, moving blankets out of frame, or foam panels along side walls tame that reflection without touching your lighting setup.
Record audio on a separate device or recorder when possible, not just through the camera’s built-in mic input, and always capture a few seconds of room tone (silence in the actual space) at the start or end of the session. Editors use room tone to smooth gaps between clips, and it’s a thirty-second task on set versus a real problem to solve later. Sync audio and video carefully if they’re on separate devices; a clap or slate at the start of each take makes that sync trivial instead of a guessing game frame by frame.
Software for Editing Green Screen Footage
The right editing software depends entirely on how often you’re doing this and how complex your composite needs to be.
For occasional use with straightforward backgrounds, many all-in-one editing programs include a basic chroma key effect that handles clean, well-lit footage without much fuss. This works fine when your capture was solid to begin with, which circles back to why the lighting and camera sections above matter more than any software choice.
For regular production work, dedicated compositing tools give you far more granular control: separate despill, edge choke, and matte refinement tools, plus the ability to layer garbage mattes and secondary corrections without flattening your work at each step. These tools have a real learning curve, but they earn it back the first time you pull a key from footage that isn’t perfect.
At the advanced end, node-based compositing software (built for visual effects work generally, not just green screen) offers the most control over difficult keys: multiple key layers, per-channel color correction, and detailed edge work frame by frame. That level of tool is overkill for a single clean interview shot well, but it’s the right call for complex composites, multiple subjects, or footage that came in with problems you couldn’t reshoot. Match the tool to the actual difficulty of your footage rather than defaulting to the most powerful option out of habit; simple footage in a complex tool just slows you down.
When to DIY and When to Bring in a Studio
DIY works fine for internal content, quick testimonials, or low-stakes projects where an imperfect key won’t cost you anything real. The math changes once brand reputation, ad spend, or a client deliverable is on the line: a controlled studio environment removes the variables (room acoustics, ceiling height, ambient light, stray reflective surfaces) that cause most amateur keys to fail. A professional crew also catches spill and wardrobe problems in the first five minutes instead of during the edit, which is where the real time savings live. If your project is a corporate interview series or anything client-facing, booking studio time for interview video production usually costs less than the hours a bad key adds to your post schedule.
— Ken
Book a Green Screen Interview Shoot in NYC
Most people lose more time fighting a bad key than they’d ever spend booking a proper setup, and that’s the real cost most DIY green screen attempts don’t account for. Ken Jones Photography, KenJonesNYC, Ken Jones NYC, runs interview shoots in a controlled Financial District studio where distance, lighting zones, and camera settings are already dialed in before you walk through the door, no trial and error on your dime.

Booking includes studio rental with the green screen rig pre-lit and tested, an interview lighting package built around the two-zone approach covered above, and full production support from grip work to post handoff, so your editor receives clean plates and labeled files instead of a mess to sort through. A short prep call ahead of your shoot date covers wardrobe, framing, and any special composite needs before the crew ever sets a light. If you’re planning a corporate interview series or a single executive sit-down, start with our corporate interview video production page to see what a booked session includes, or check current studio rental availability if you’d rather bring your own crew into a space that’s already built for this.
Sources
- 10-bit pixels & 4:2:2 chroma subsampling for live video contribution — Haivision
- Green Screen Studio Setup: How to Get Clean Chroma Keys — Mediagear
- Complete Green Screen Guide: Master Chroma Key Technology for Professional Video Production — Vibbit
- Green screen lighting setup techniques — StudioBinder
FAQ
What Is the Best Background Setup for a Green Screen?
A properly tensioned, wrinkle-free screen (fabric, paper, or a painted wall) lit evenly by matched fixtures at 45 degrees, positioned 6 to 10 feet from the subject, gives the most reliable base for a clean key.
How Do You Set Up a Background for a Virtual Interview?
Hang or mount a wrinkle-free green surface, light it separately from your subject with even, matched sources, keep the subject at least 6 feet away, and lock your camera’s exposure and white balance before recording.
How Much Does a Green Screen Setup Cost?
Costs range widely based on scale: a basic fabric backdrop with a pair of budget LED panels can run a few hundred dollars, while a professional studio-grade rig with dedicated lighting and a cyc wall represents a much larger investment; booking studio time avoids that upfront cost entirely.
What Are Common Green Screen Mistakes to Avoid?
The most frequent mistakes are shooting too close to the screen, using one lighting setup for both background and subject instead of two, wearing green or reflective clothing, and skipping locked manual camera settings before recording.