
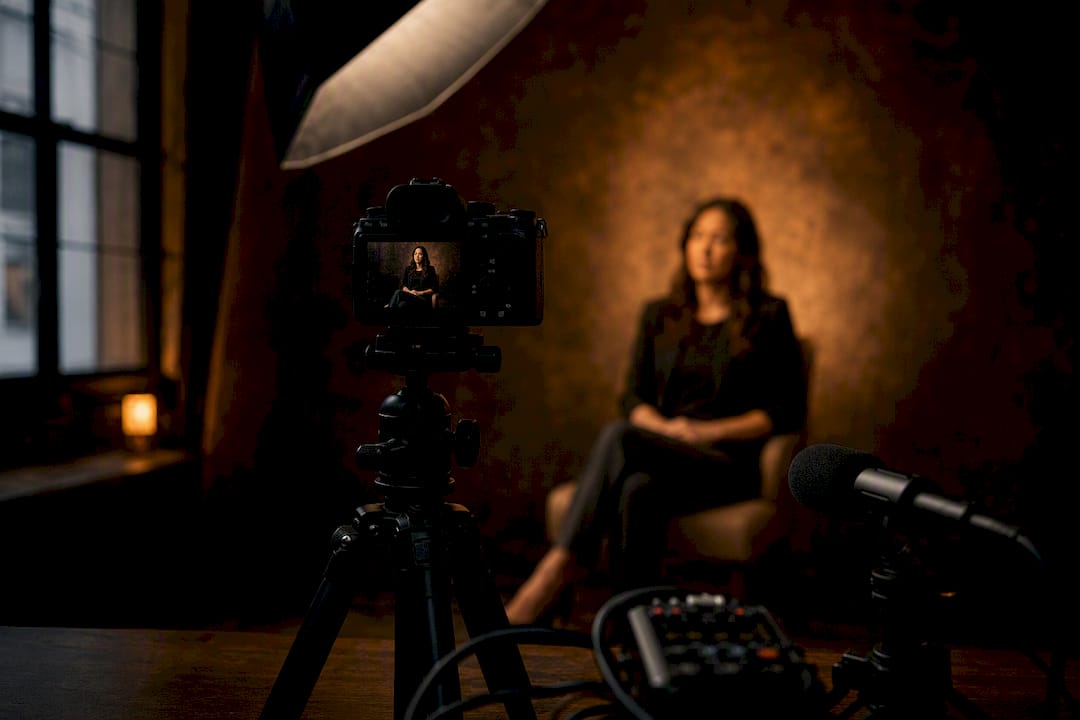
Audio comes first, lighting second, camera dead last. That order surprises people, but it’s the one that separates a talking head video setup that gets watched from one that gets abandoned at the fifteen-second mark. Five items cover the essentials: a decent microphone, a way to capture it (interface or USB), a camera, a controllable light on your face, and recording software. Fix your room and your monitoring before you spend another dollar on a camera body.
TL;DR:
- High-quality audio and proper lighting are more impactful than high-end cameras for engaging talking head videos, especially during initial setups.
- Using a dynamic microphone suited to untreated rooms and controlling light on your face are crucial steps before investing in better cameras or lenses.
- Maintaining at least three feet distance from your background ensures natural background separation without additional equipment.
- Recording at 1080p with a high bitrate and consistent color temperature provides professional-looking footage that’s easy to edit and reformat.
- Regularly test and power your gear properly, particularly external power sources, to prevent interruptions or equipment failures during shoots.
Table of Contents
- What Do You Need for a Talking Head Video Setup?
- Which Camera Works Best for a Talking Head Video?
- How Do You Light a Talking Head Video Properly?
- What Kind of Microphone and Audio Chain Do You Actually Need?
- How Should You Frame Yourself for a Sit-Down Interview?
- How Do You Create Background Separation Without a Green Screen?
- What’s the Right Recording Workflow for Local vs Remote Shoots?
- How Do You Troubleshoot Audio and Video Sync Issues?
- What Production Lessons Come From Real Talking Head Shoots?
- How Do You Manage Battery Life and Power During Longer Shoots?
- What Recording Format and Resolution Should You Use?
- What Should You Wear for a Talking Head Video?
- How Do You Keep Your Facial Expressions Natural on Camera?
- What I’d Tell You If You Only Had Ten Minutes
- Where to Go for More Technical Depth
- Sources
- FAQ
What Do You Need for a Talking Head Video Setup?
A reliable video podcast setup doesn’t require a shopping spree. It requires five things done in the right order, and most people get the order backward because cameras are fun to shop for and acoustic foam is not.
Here’s the checklist I’d hand a client walking into this cold:
- A microphone that matches your room. A dynamic mic rejects ambient noise better than a condenser if your space isn’t treated, which covers almost everyone recording at a desk or in a home office.
- A capture path. USB works fine for solo recording; an audio interface with XLR becomes necessary once you add a second mic or want cleaner gain control.
- A camera you already understand. Your phone, your laptop webcam, or a mirrorless body all work, but only if you know its autofocus quirks before you hit record.
- One controllable light source on your face. Not a ring light glued to your webcam. Something you can move, dim, and diffuse.
- Recording software suited to the job. Local software for solo work, a remote-recording platform for interviews with someone else, and a transcript-based editor if you hate scrubbing timelines.
For staging, think in three tiers. A starter kit runs a USB dynamic mic, wired headphones, a clamp light with a diffusion sheet, and your phone on a tripod. A committed kit adds an audio interface, a two-light setup, and an external webcam or entry mirrorless body. A studio-grade kit brings in three-point lighting, a mirrorless camera on a capture card, and dedicated recording software with a monitor for playback checks. Upgrade in that order. Skipping straight to the studio-grade camera while your audio is still bouncing off bare walls is the single most common mistake I see people make, and it’s completely avoidable.
Which Camera Works Best for a Talking Head Video?
Your phone is fine. I mean that. If you’re recording a weekly update video for a small team or a quick social clip, a modern phone camera mounted at eye level with decent light on your face will outperform a cheap webcam and cost you nothing extra. The camera stops being the bottleneck long before people think it does.
Where it starts to matter is when you’re publishing something that represents your brand at scale, a course, a recurring interview series, a corporate video that lives on your homepage for two years. That’s when a mirrorless camera earns its keep, mostly because of depth of field and dynamic range, not resolution. A shallow depth of field separates you from your background in a way no phone sensor can fully replicate, and that separation reads as “produced” even to viewers who couldn’t tell you why.
If you go mirrorless and want to use it live, the camera itself won’t just plug into your laptop and register as a webcam. You need an HDMI capture card, such as an Elgato Cam Link, sitting between the camera’s HDMI output and your computer’s USB port. Skip this step and your “upgraded” camera setup does nothing, because your software will default back to the built-in webcam.
On settings: shoot at 24 or 30 frames per second for talking-head content, since higher frame rates are for slow motion you won’t need here. Set your shutter speed to roughly double your frame rate (so 1/50 or 1/60 at 24 to 30fps) for natural motion blur. Keep ISO as low as your lighting allows, since noise is far more visible in flat, well-lit talking-head footage than in dramatic, shadow-heavy work. Lock your white balance manually rather than trusting auto white balance to stay consistent shot to shot, and if your camera has a reliable eye-autofocus mode, use it, but do a test take first. Older mirrorless bodies hunt for focus under low, flat lighting, which is exactly the lighting a lot of home setups use.
Mount your camera at eye level, not below your chin and not looking down at you from a shelf. Sit far enough back that the lens isn’t distorting your face, generally three to four feet minimum for a standard lens, more if you’re using a wider focal length.
How Do You Light a Talking Head Video Properly?
Three-point lighting is still the foundation, and it works whether you’re spending $50 or $5,000. The three points are key, fill, and back, and each does a specific job.
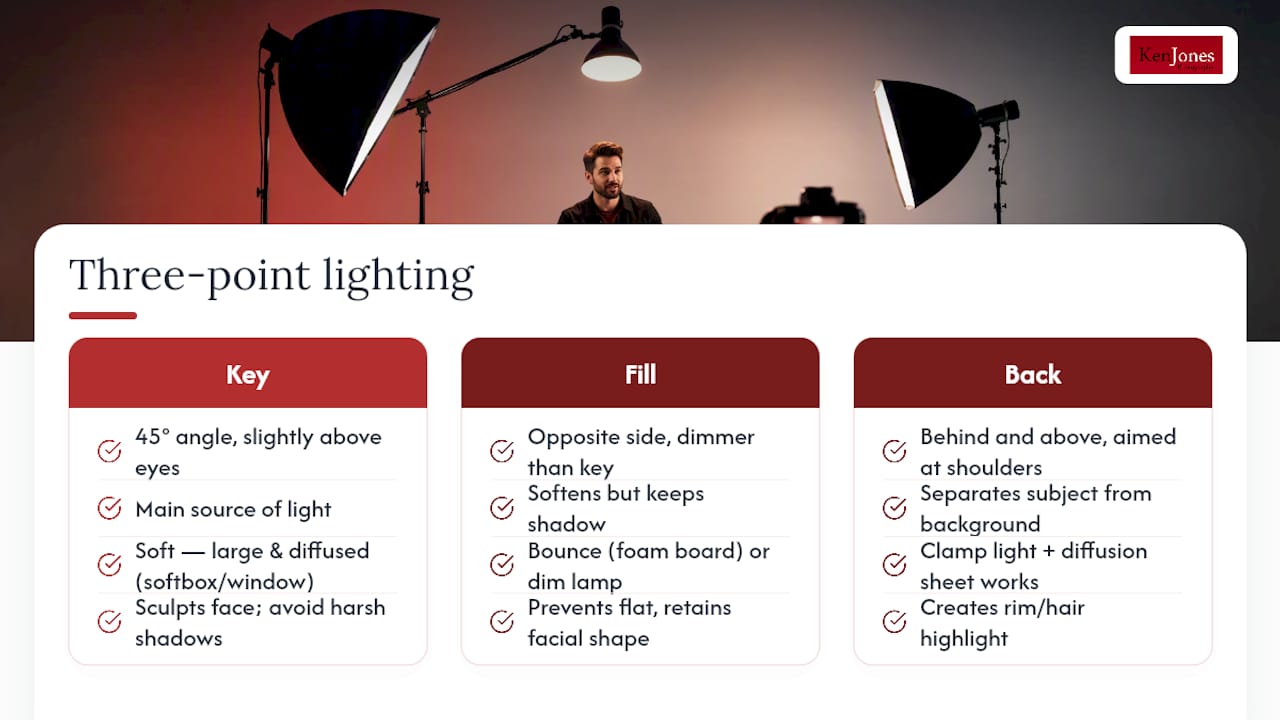
The key light sits at roughly a 45-degree angle from your face, slightly above eye level, angled down. This is your main source and it should be soft, meaning large relative to your face and diffused through something like a softbox, umbrella, or even a bedsheet over a window. A hard, small light source at this angle carves harsh shadows under your nose and eyes, which is the look you want to avoid unless you’re going for something dramatic.
The fill light sits on the opposite side, dimmer than your key, and its job is to soften the shadows the key light creates rather than eliminate them entirely. You want some shadow, it’s what gives your face shape. Total elimination of shadow is what makes corporate headshots look flat under fluorescent office lighting, and it’s not a look worth chasing.
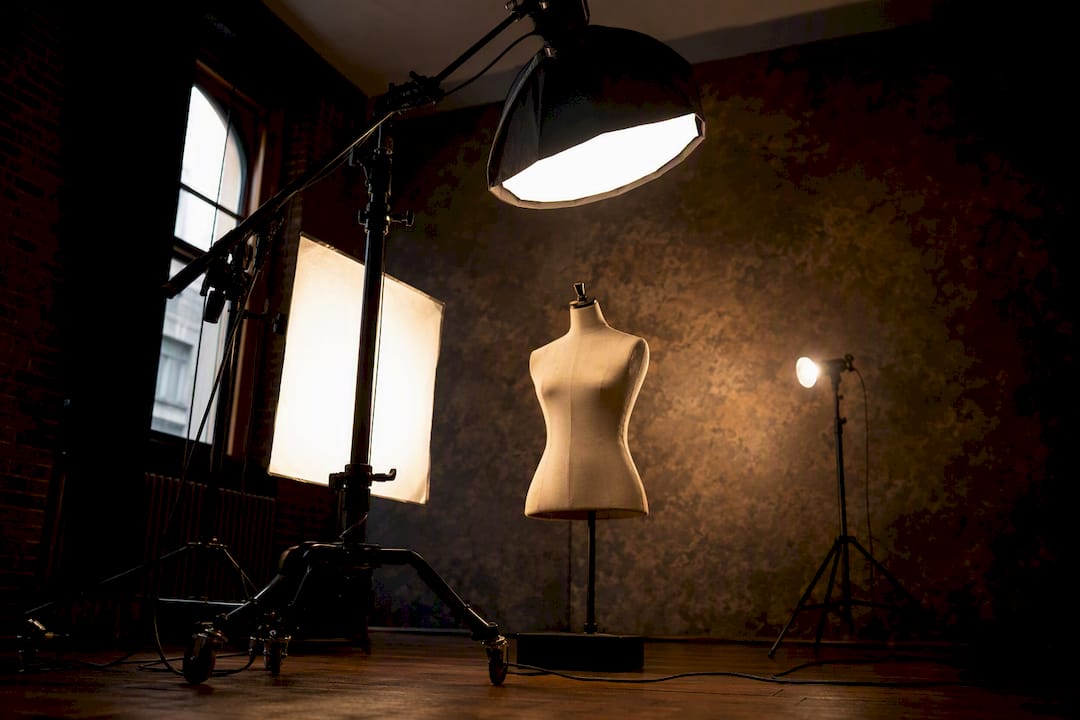
The back light (sometimes called a hair light or rim light) sits behind and above you, aimed at your shoulders and the back of your head. This is the light most home setups skip, and it’s the one that does the most to separate you from your background. Without it, you tend to visually merge into whatever’s behind you, especially on a dark backdrop.
You don’t need three purchased lights to get this result. A window providing soft daylight can serve as your key, with a white foam board bounced back at you as fill, and a cheap clamp light with a diffusion sheet aimed at your shoulders as your back light. Clamp lights from a hardware store, fitted with daylight-balanced bulbs and a sheet of diffusion material clipped over the reflector, get surprisingly close to a proper softbox for a fraction of the price. If you’re working in a tight space where three lights isn’t physically possible, a single large soft key close to your face, positioned slightly off-center, will carry a talking-head video further than most people expect.
Color temperature is where a lot of home setups quietly fall apart. Mixing daylight-balanced light (5600K) with warm household bulbs (2700 to 3000K) produces footage with an orange or green color cast that’s a pain to correct in post. Match your sources, or at minimum, check that your key and fill are the same temperature even if your background practical light runs warmer for style. Bulbs with a CRI (color rendering index) above 90 render skin tones accurately; cheaper bulbs below 80 CRI tend to make skin look slightly sickly no matter how you white balance in camera. I’ve built lighting configurations for photographers around exactly this principle, and it applies just as much to a home office setup as it does to a studio floor on Fulton Street.
What Kind of Microphone and Audio Chain Do You Actually Need?
Here’s the uncomfortable truth: your audience will forgive mediocre video far more readily than they’ll forgive bad audio. A slightly soft image reads as a style choice. Crackling, hollow, or hissy audio reads as amateur, and people close the tab.
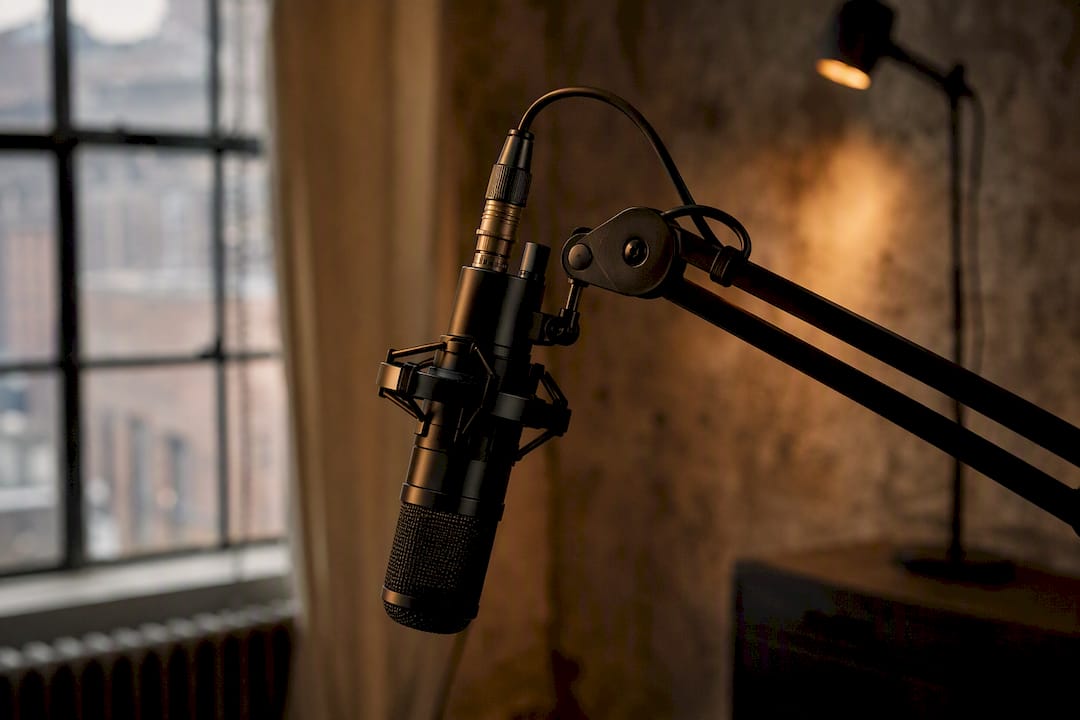
For most untreated rooms, a dynamic microphone will serve you better than a condenser, because a dynamic capsule rejects more of the room noise and echo bouncing off your walls. Condensers are more sensitive and pick up more detail, which sounds great in a treated studio and terrible in a bedroom with hardwood floors and bare walls. If you’re recording in your living room, buy the dynamic mic.
USB microphones plug straight into your computer and work well for solo recording. The moment you add a second person, want to route audio to multiple destinations, or need finer control over gain staging, an audio interface with XLR inputs becomes worth the investment. The interface sits between your microphone and your computer, converting the analog signal and giving you physical gain knobs instead of software sliders buried in a menu.
Proximity technique matters more than people realize: speaking six inches from a dynamic mic gives you a warmer, fuller sound than speaking two feet away, where the room starts to creep back into the recording. Get close, and stay at a consistent distance throughout the take.
Monitor everything through wired headphones, not Bluetooth. Wireless monitoring introduces latency you’ll hear as a delay between your voice and what reaches your ears, which is disorienting enough to throw off your delivery. Wired headphones give you a real-time check on hums, clicks, and clipping while you’re still recording, not after you’ve wrapped and moved on to the next thing.
None of this replaces room treatment, and room treatment plus disciplined monitoring often improves perceived quality more than swapping microphones does. You don’t need acoustic foam panels covering every wall. A rug on a hard floor, curtains over a window, a bookshelf packed with actual books, even blankets hung temporarily behind your camera position, all cut down on the reflections that make a room sound “boxy.” Record a ten-second test clip, clap once, and listen for how long the echo tail lasts. If it rings, treat the room before you touch the mic budget again.
How Should You Frame Yourself for a Sit-Down Interview?
Talking head framing follows the rule of thirds: your eyes should land roughly one-third of the way down the frame, not dead center. Center-framed eyes tend to leave awkward headroom above your head, which reads as amateurish even if viewers can’t articulate why.
Whether you shoot waist-up or head-and-shoulders depends on what you’re doing with your hands. If your delivery involves gesturing, a waist-up frame gives you room to move without your hands constantly clipping out of frame, which is distracting in a way that pulls focus from what you’re saying. If you’re mostly still, delivering scripted material, a tighter head-and-shoulders frame creates intimacy and works better for shorter clips meant for social feeds.
Keep your eye gaze locked just beside or just above the lens, not directly buried in a teleprompter screen positioned off to the side. A teleprompter mounted directly in front of the lens, using a beam-splitter glass, keeps your eye line locked on camera while you read, which is the whole point of the device. If you’re using cue cards instead, tape them as close to the lens as physically possible rather than off to one side; every degree your eyes drift from the lens reads as disengagement to your viewer.
Small gestures work fine on camera as long as they stay inside your frame lines. Test this before you record: raise your hands as high and wide as you naturally would, and check the preview to make sure nothing clips off the top or sides. Nothing kills a take faster than realizing after the fact that your hand disappeared out of frame every time you made a point.
How Do You Create Background Separation Without a Green Screen?
Distance does more work here than gear. Sitting at least three feet from your backdrop lets your key light’s falloff and your camera’s depth of field do the separating naturally, without a single extra light. Sit closer than that and everything behind you gets lit as brightly as your face, flattening the whole frame into one plane.
A single practical light, a lamp, a strip light, a colored LED tucked behind an object, gives your background visual interest without competing for attention. This beats the instinct to fill a shelf with books, plants, and awards, which almost always reads as cluttered rather than credible on camera. A backdrop with visible wrinkles or a hotspot from a light hitting it too directly will pull viewer attention away from your face every time, so check your frame for both before you start recording.
If you’re going for a branded or editorial feel, negative space works in your favor. A single clean surface with one intentional object, lit separately from your key, often looks more considered than a busy backdrop stuffed with logos and props. I’ve walked into corporate interview shoots where the client insisted on displaying every award on the wall behind the subject, and it never once improved the final footage.
What’s the Right Recording Workflow for Local vs Remote Shoots?
If you’re recording solo at a desk, record directly to your camera or through your capture card into local software like OBS, which gives you full control over inputs and doesn’t depend on your internet connection holding steady. For remote interviews, a platform that records local tracks per participant, rather than relying on the live call feed, protects you when someone’s connection drops mid-interview, and Riverside AI is a common choice for this purpose. Riverside is a common choice here specifically because each guest’s audio and video record locally on their own device, then upload afterward.
Whichever camera setup you’re running, let your camera record its own scratch audio even though your real audio is coming from an external mic. Most editing software, including Descript and Premiere, can automatically align that scratch audio waveform with your clean mic track, which saves you from manually nudging clips into sync by ear.
For post-production, Descript works well if you’d rather edit by cutting text in a transcript than scrubbing a timeline frame by frame, which is a faster workflow for most talking-head content since you’re mainly cutting out filler words and dead air.
Keep your file naming boring and consistent: date, project name, take number. “TalkingHead_2026-03-14_Take02” beats “final_FINAL_v3” every time you’re searching for a file six months later. Export your final master at a high bitrate and keep it, then generate compressed versions for whatever platform you’re posting to, rather than re-exporting from scratch each time a client asks for a different format.
How Do You Troubleshoot Audio and Video Sync Issues?
Run this preflight sequence before every single take, not just the first one of the day:
- Check your audio levels by speaking at your normal volume and watching for peaks that don’t clip into the red.
- Confirm your framing matches what you locked in during setup, since tripods drift and desks get bumped.
- Verify white balance hasn’t shifted, especially if you’re near a window and the sun has moved since your last take.
- Put your headphones on and listen for hum, hiss, or an unexpected echo before you commit to recording.
- Record a ten-second test clip and actually play it back rather than trusting that everything sounds fine live.
If your audio and video drift out of sync during a live stream, most software lets you set a manual offset in the audio settings to compensate, usually measured in milliseconds; small delays are common with USB audio interfaces and are worth correcting once rather than every session. A persistent hum usually means a ground loop, which you fix with a cheap ground loop isolator or by plugging your gear into the same power strip instead of separate outlets. If your footage looks fine but sounds hollow or distant, check your cable connections first. Loose XLR connectors are the most common invisible failure point on any shoot. And if your camera keeps hunting for focus mid-sentence, switch to manual focus for the take. Autofocus systems get confused by hand gestures and shifting light far more often than people expect.
What Production Lessons Come From Real Talking Head Shoots?
A client came in a few years back convinced their interview video needed a shallow depth of field so aggressive that only their eyes stayed sharp, everything else, including their own ears, drifted soft. It looked striking in a still frame. On video, with any head movement at all, half their face fell out of focus mid-sentence. We stopped the shoot, closed the aperture two stops, and the footage instantly looked more professional, not less. Sometimes the technically “best” setting is the wrong choice for how a real person moves and talks.
On location shoots around Lower Manhattan, the setup that holds up consistently is simple: subject at least three feet from any wall or window, one soft key close to the face, one dim practical light in the background for separation, and the mic six inches away, slightly off-axis to reduce plosives on hard consonants. That combination survives changing daylight, cramped conference rooms, and the inevitable moment someone’s assistant walks through frame carrying coffee.
For corporate clients producing interview video content at scale, consistency across sessions matters more than any single dramatic lighting choice. The same key angle, the same mic distance, the same color temperature, session after session, is what makes a company’s video library feel like one coherent brand instead of five different setups stitched together.
How Do You Manage Battery Life and Power During Longer Shoots?
A camera dying mid-sentence during your best take of the day is entirely preventable, and it happens constantly to people who assume a full charge in the morning covers an afternoon shoot. It usually doesn’t, especially with mirrorless bodies running an external display or streaming live.
Wherever possible, run your camera on external power rather than battery for anything longer than a quick clip. A dummy battery adapter that plugs into a wall outlet keeps your camera running indefinitely and removes the anxiety of watching a battery icon during an interview you can’t easily reshoot. If wall power isn’t an option, keep at least two fully charged spare batteries on hand and swap proactively during a natural pause rather than waiting for a warning indicator to appear mid-take.
Your microphone and interface need power planning too. Wireless mic systems and some USB interfaces draw from internal batteries that drain faster than people expect, particularly in cold rooms or during long multi-hour sessions. Check charge levels before you start, not after your second guest has already sat down.
For anything running more than an hour, and especially for remote interviews where you can’t simply pause and swap gear, build in a five-minute check between segments to glance at battery percentages across every device, camera, mic, lights, and laptop alike. Extended shoots fail more often from a dead wireless mic pack than from any lighting or framing mistake, and it’s the easiest problem on this entire list to prevent.
What Recording Format and Resolution Should You Use?
For most talking-head content, 1080p at 24 or 30 frames per second is still the practical sweet spot. It’s smaller to store, faster to edit, and indistinguishable from 4K to most viewers watching on a phone or laptop screen, which is where the bulk of this content gets consumed anyway.
Record in 4K instead of 1080p when you plan to crop or reframe in post, since the extra resolution gives you room to punch in without visible quality loss, useful for cutting between a wide shot and a tighter crop from the same single camera. It’s also worth it if the footage is going somewhere permanent, like a homepage video that needs to look sharp for a couple of years.
Shoot in your camera’s standard color profile rather than a flat log profile unless you’re comfortable color grading in post. Log footage looks washed out and gray straight out of camera, and it requires a color correction pass to look right, extra work that isn’t worth it for a weekly talking-head upload but matters more for polished brand or corporate video.
Whatever resolution you choose, keep your bitrate high enough to avoid compression artifacts, especially in scenes with fine detail like textured clothing or busy backgrounds. A high bitrate file takes more storage space but preserves quality through the inevitable re-exports and platform compressions that follow. Export your master file once at full quality, then generate compressed versions per platform rather than repeatedly re-exporting from your original edit.
What Should You Wear for a Talking Head Video?
Solid colors read better on camera than busy patterns. Tight stripes, small checks, and fine textures can create a shimmering moiré effect on video, especially when compressed for streaming, that simply doesn’t happen with a plain shirt or blazer.
Avoid pure white and pure black in the same outfit if you can help it. Cameras struggle to expose for both extremes at once, often blowing out a white shirt while crowding detail into a black jacket’s shadows. Mid-tone colors, blues, muted greens, warm grays, give your camera’s sensor an easier job and tend to flatter most skin tones under standard key lighting.
Match your wardrobe to your background rather than fighting it. A subject in a navy shirt against a navy backdrop starts to visually merge into the background, undermining any separation your lighting worked to create. Check contrast between what you’re wearing and what’s behind you during your test recording, not after you’ve already filmed twenty minutes of usable footage.
Small details carry more weight on camera than people expect. Wrinkled collars, visible lint, and jewelry that catches your key light and throws a hot reflection are all things a live audience would forgive and a static frame won’t. Do a quick check in your monitor or a mirror before you roll, glancing specifically for anything catching unwanted light or sitting crooked, since these are the details that jump out in a still frame that never bothered anyone in person.
How Do You Keep Your Facial Expressions Natural on Camera?
The instinct to “perform” for a camera is exactly what makes most talking-head footage feel stiff. Talk to the lens the way you’d talk to a colleague sitting across a coffee table, not the way you’d address an auditorium.
Blink normally. People self-consciously trying not to blink on camera end up staring in a way that reads as unsettling rather than confident. Let your face do what it naturally does when you’re actually interested in what you’re saying, which usually means you need to actually believe the material, not just recite it.
If you’re working from a script or teleprompter, read it enough times beforehand that you’re not decoding words in real time. Viewers can tell the difference between someone recalling an idea and someone reading it cold, and the giveaway is almost always in the eyes, a slight flatness that comes from cognitive load rather than genuine engagement.
Breaks help more than people think. If you’re recording several takes in a row, step away between them rather than resetting immediately. A stiff smile held too long, or a serious expression held past the point of sincerity, both start to look manufactured after the fifth consecutive take without a pause.
Pro Tip: Record a short warmup take before your real one, just talking through your first few lines. You’ll usually find your face relaxes into something far more natural by the second attempt, and comparing the two takes side by side is the fastest way to see exactly what “natural” looks like on you specifically.
What I’d Tell You If You Only Had Ten Minutes
If you remember nothing else from this guide, remember the order: audio, lighting, camera. In that sequence. A treated room with a $100 dynamic mic beats an untreated room with a $2,000 camera every single time a viewer actually presses play, and most people get this backward because gear shopping feels more productive than moving furniture around to kill an echo.
The shortcut worth taking is this: build your setup once, test it thoroughly, then stop tinkering with it. Consistency across sessions matters more than chasing marginal upgrades between every shoot. If you’d rather skip the trial and error entirely, our studio rental and production support in the Financial District handles the lighting, audio, and camera work so you can focus on what you’re actually saying, and our corporate interview video production service exists for exactly this kind of project. Either way, the learning curve here is shorter than it looks, and every upgrade after the first working kit is optional, not urgent.
— Ken
Where to Go for More Technical Depth
For readers who want to go deeper on any single piece of this setup, a few sources are worth bookmarking. The Soundstripe video podcast setup breakdown walks through the five-item core kit and cost tiers in more detail than fits here. For lighting specifically, the budget lighting guide from Markus Hagner Photography covers three-point setups on a real budget. On remote recording workflows, the Alan Spicer YouTube equipment guide explains why local per-participant recording protects your footage from dropped connections.
Sources
- Video Podcast Setup: What You Need and What It Costs
- Video Podcast Equipment: The Ultimate 2026 Studio Setup Guide
- How to Shoot a Talking Head Video with Professional Lighting on a Budget (July 2026)
- YouTube Podcast Setup Guide 2026: Gear, Cameras, and Workflow That Actually Work
FAQ
How Do You Make a Talking Head Video?
Set up your five core items, mic, capture, camera, a controllable light on your face, and recording software, in that priority order, then frame yourself using the rule of thirds with your eyes roughly one-third down the frame before you start recording.
What’s the Best Camera for Talking Head Videos?
Your phone or a webcam works fine for most content; a mirrorless camera becomes worth the investment once depth of field and image quality matter for a recurring or branded video series, and it requires an HDMI capture card if you want to use it live as a webcam.
What Is the Talking Head Video Format?
A talking head video is a format where a single presenter speaks directly to the camera, typically framed from the chest or waist up, used for interviews, tutorials, corporate updates, and vlogs where the presenter’s delivery is the main content.
Do I Need Expensive Gear to Start Recording Talking Head Videos?
No. A starter kit built around a USB dynamic mic, wired headphones, a clamp light with diffusion, and your phone on a tripod covers the essentials; the room you record in and how you monitor your audio matter more than the price of your camera.
How Far Should I Sit From My Background?
Keep at least three feet between you and your backdrop so your key light’s falloff and your camera’s depth of field can separate you naturally from what’s behind you, rather than flattening the whole frame into one plane.