

Preserve skin, don’t rescue it. Fix white balance and primary corrections first, confirm on scopes, then use secondaries only for subtle refinement. Run two checks before touching a face: sample it on the vectorscope against the skin tone line, and verify exposure on the waveform, especially in the shadows where darker skin tones live.
TL;DR:
- Ensuring proper white balance and exposure with a gray card at the start prevents the need for extensive corrections later, especially on darker skin tones.
- The skin tone cluster on a vectorscope remains consistent across ethnicities, making it a reliable reference for correct color grading by sampling specific pixels.
- Applying secondary corrections to skin should follow precise primary fixes; heavy edits at this stage usually indicate earlier nodes were set incorrectly.
- Consistent input color management and grading before creative looks help maintain skin tone continuity across multiple cameras and scenes.
- Proper on-set practices, including calibrated monitors and gray card captures, are essential to avoid skin tone issues that software corrections cannot fully fix later.
Table of Contents
- What Is Skin Tone Color Grading, Really?
- Getting the Foundation Right Before You Touch Skin
- How Do You Read a Vectorscope for Skin Tone?
- Using Secondaries Without Wrecking the Face
- Where Skin Work Belongs in the Node Order
- Keeping Skin Consistent Across Cameras and Scenes
- Grading Fairly Across a Range of Skin Tones in One Frame
- Adding Creative Looks Without Losing the Face
- Studio-Tested Rules and On-Set Lessons
- A Veteran’s View: Why Invisible Skin Work Marks a Professional Grade
- How Ken Jones Photography Helps Teams Avoid Skin Tone Problems
- Sources
- FAQ
What Is Skin Tone Color Grading, Really?
Skin tone color grading is the process of getting faces to read as natural, healthy, and consistent across every shot in a project, whether that’s a beauty campaign, a corporate interview, or a fashion editorial with five different cameras rolling on the same set. Most people think it means going into HSL and pulling a slider until skin “looks better.” That’s backward, and it’s the single most common mistake I see from editors who learned color on YouTube instead of on a set.
I’ve been lighting and grading faces in New York for over three decades, from Fulton Street beauty shoots to fashion editorials shot along the waterfront in Lower Manhattan, and the lesson never changes: skin color problems are almost always exposure and white balance problems wearing a disguise. Fix the foundation, and the face usually falls into place on its own. That’s the core habit professional colorists share, and it’s the difference between a grade that looks graded and one nobody notices, which is the whole point.
Getting the Foundation Right Before You Touch Skin
Every skin problem you fix in HSL is a problem you should have solved two nodes earlier. Here’s the order that keeps you out of trouble:
- Record a gray card or color chart on set. A ten-second capture at the top of a scene gives you a neutral reference that makes white balance almost mechanical instead of a guessing game.
- Pick a hero shot and grade it first. Set your global temperature and tint against the gray card, then work lift, gamma, and gain until the whole frame reads clean, not just the face.
- Set contrast and saturation globally before any targeted work. A slightly flat image with correct color beats a punchy image with a cast.
- Work in a high enough bit depth (Resolve’s default 16 bit float in most timelines) and calibrate your monitor regularly. Grading skin on an uncalibrated display is like mixing paint in a dark room.
Skip the gray card and you’re grading by eye against a monitor that drifts week to week. I’ve watched editors burn an entire afternoon chasing a hue shift that a ten-second chart would have prevented.
How Do You Read a Vectorscope for Skin Tone?
The vectorscope’s skin tone line, sometimes called the “I line,” is the single most useful reference for faces. Skin across a wide range of ethnicities tends to cluster near that same hue angle. Brightness and saturation vary by individual, lighting, and exposure, but the hue itself stays remarkably consistent, which is why it works as a guide rather than a rulebook you follow blindly.
Practical use looks like this:
- Sample a cluster of skin pixels, not the whole face, using a small qualifier or cursor.
- If the cluster sits off the skin tone line, you likely have a white balance or tint issue, not a “skin” issue.
- If the cluster sits on the line but reads too saturated or too pale, that’s a genuine skin adjustment, not a global fix.
- Cross check with the waveform and RGB parade, especially on darker skin, where underexposure hides in the lower third of the waveform and gets misread as a color problem instead of an exposure one.
Using Secondaries Without Wrecking the Face
Once primaries are locked, secondaries exist for refinement, not repair. If your skin qualifier needs a heavy saturation pull or a big hue swing to look right, the earlier node work was probably wrong, and you’re better off going back than compounding the error downstream.
- Build an HSL key around the skin cluster, soften the edges, and check it moving, not just on a still frame.
- Prefer Hue vs Hue adjustments over blunt saturation cuts. Rotating a hue keeps texture and dimension; slashing saturation flattens skin into a mask.
- For moving subjects, use tracked power windows or an automated skin matte so the correction rides the face through the whole shot instead of catching the background at frame twelve.
- Keep the qualifier’s effect small. If you’re fighting it, the fix belongs earlier in the chain.
Where Skin Work Belongs in the Node Order
A workflow I’ve relied on for years, and one that lines up with standard cinematic grading structure, runs like this:
- Input color management / color space transform to normalize camera gamuts.
- Exposure and white balance against your gray card reference.
- Contrast and saturation as a global creative pass.
- Shot matching across cameras and setups.
- Skin protection node for subtle, targeted correction.
- Creative look or LUT, applied last and at reduced strength.
Put skin fixes before shot matching and you’ll redo them every time you tweak a match. Put a heavy LUT before skin protection and you’ll be fighting the LUT’s own color shifts instead of the image itself. The skin node should be a whisper, not a rescue operation.
Keeping Skin Consistent Across Cameras and Scenes
Multi-camera shoots are where skin consistency falls apart fastest, usually because nobody normalized the inputs first. Apply input transforms to bring every camera’s gamut into the same space before any creative decisions, because mismatched input handling is a common source of cross-shot inconsistency that no amount of secondary correction will fully fix later.
- Pick one hero frame per setup, grade it fully, then copy that grade as your starting point for the rest of the scene.
- Build a project LUT and apply small per-shot trims instead of rebuilding heavy skin fixes on every clip. Repetition is where drift creeps in.
- Run a gallery view of stills across the timeline, then play the scene in real motion. Stills lie about consistency more often than people expect.
Grading Fairly Across a Range of Skin Tones in One Frame
Always judge shadows and contrast against the darkest face in the shot, not the lightest. If you crush shadows to make a fair-skinned subject pop, you’ll lose detail on everyone darker in the same frame, and that’s usually where problems start on set, not in the grade.
The fix starts before the camera rolls. Add more fill light and use a flatter key to preserve texture across a group with mixed skin tones. In post, treat shadow detail and noise as a trade off you manage deliberately, not an afterthought you patch with one global slider.
Pro Tip: Expose for your darkest face on set, then let post protect the highlights. It’s far easier to pull down a bright face than to rebuild detail that was never captured in the shadows.
Adding Creative Looks Without Losing the Face
Style is welcome. A ruined face is not. Apply any LUT on its own node, then knock the strength down, often to somewhere in the 60 to 80 percent range, before layering a skin protection pass on top, since full-strength LUTs are one of the fastest ways to wreck skin that otherwise looked fine in the primaries.
- When a director wants moody shadow color, rotate the hue in that region rather than cutting saturation across the whole face.
- Check your work on scopes before trusting your eyes, since a monitor that’s slightly off can make a correct grade look wrong.
- Render a test clip and watch it on a second, uncalibrated screen or with a small group. If skin looks off to someone who wasn’t staring at it for three hours, it probably is.
Studio-Tested Rules and On-Set Lessons
A beauty shoot years ago came back from set with a heavy green cast under fluorescent practicals mixed with daylight through the windows. No gray card had been shot. We rebuilt neutral balance using skin as an approximate reference, then rotated hue selectively to pull the green out of shadow areas without flattening the model’s actual color. It worked, but it took three times longer than a ten-second chart would have saved us.
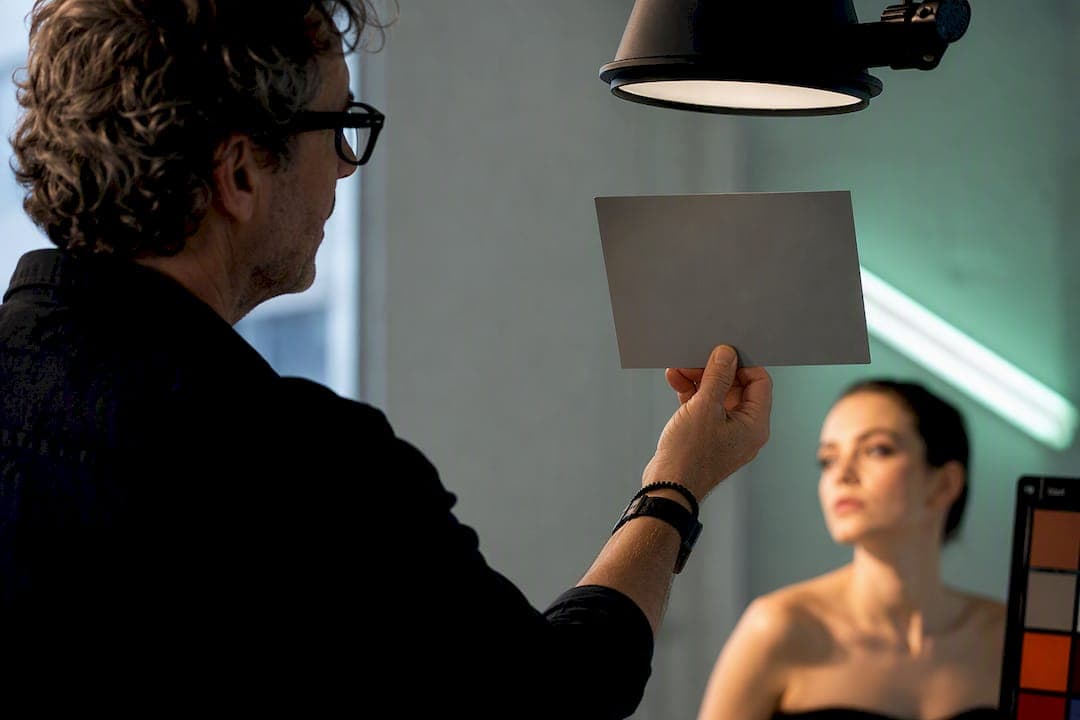
Reflective jewelry and unsheened, shiny wardrobe fabric throw color casts onto skin that no grade fully removes. I flag both at wardrobe fittings now. My on-set checklist stays short: shoot the gray card, calibrate the monitor before the first take, lock a hero shot early, and hand off LUTs with clear strength notes for whoever grades next.

Pro Tip: Ask your DP to shoot a gray card under every distinct lighting setup, not just once at the top of the day. Mixed lighting changes faster than people expect, especially near windows.
A Veteran’s View: Why Invisible Skin Work Marks a Professional Grade
Skin is a memory color. Viewers don’t know what a “correct” sky looks like, but they know instantly when a face looks wrong, because they’ve looked at faces their entire lives. That’s why the best grading work on skin is invisible. Nobody compliments a grade for good skin. They just don’t notice it, which is exactly the goal.
I tell clients the same thing before every shoot: give me a gray card capture and one agreed hero look, and I’ll protect the faces through everything creative we build on top. A director once pushed hard for a teal and orange treatment on a fashion story that would have shifted every model’s skin toward orange. We kept the look in the shadows and midtones, rotated the highlight hue instead of pushing saturation across skin, and the story still read bold without anyone looking sunburned.
— Ken
How Ken Jones Photography Helps Teams Avoid Skin Tone Problems
Most skin tone headaches start on set, not in the grade, which is exactly why production choices matter as much as software. A well-run photography studio builds the capture side to remove those headaches before they exist: calibrated monitoring during the shoot, hair and makeup coordination that avoids reflective surprises, gray card captures at every lighting change, and LUT handoffs that tell your colorist exactly what strength and intent to expect.

If you’re running a beauty or fashion campaign with a tight brand palette, or a multi-camera shoot where five different setups all need to match by the time they hit the grade, that on-set discipline saves real hours later. It’s the same thinking behind color choices in branding generally, where color perception shapes how a brand gets read before a single word gets said. Browse the beauty photography portfolio to see the production standards behind that approach, or reach out to book studio time at Fulton Studio for your next shoot.
Sources
A few resources worth keeping bookmarked as you build out your own workflow:
- Skin tone preservation: what professional colorists do differently
- What is the skin-tone indicator on a vectorscope?
- How to color correct skin tones
- DaVinci Resolve cinematic color grading
FAQ
How do I determine my skin tone for color grading purposes?
Sample the face on a vectorscope and check where it clusters against the skin tone line. That hue reading, not a verbal description like “warm” or “cool,” is what actually guides accurate correction.
How much do colorists get paid?
Rates vary widely by market, project type, and experience, and colorists who invest in calibrated monitoring and proper hardware typically command higher day rates than those working on uncalibrated setups.
What is the rarest skin tone to grade correctly?
There’s no single “rarest” tone, but very deep skin tones and very pale, high-contrast skin both get mishandled often because editors default to universal settings instead of checking exposure and the vectorscope for that specific face.
How much does it cost to get color graded professionally?
Cost depends on project length, complexity, and whether you need shot matching across multiple cameras versus a single interview setup. A professional photography studio can provide a cost estimate based on your specific production, from a single beauty campaign to a full multi-camera shoot, with costs varying accordingly.