
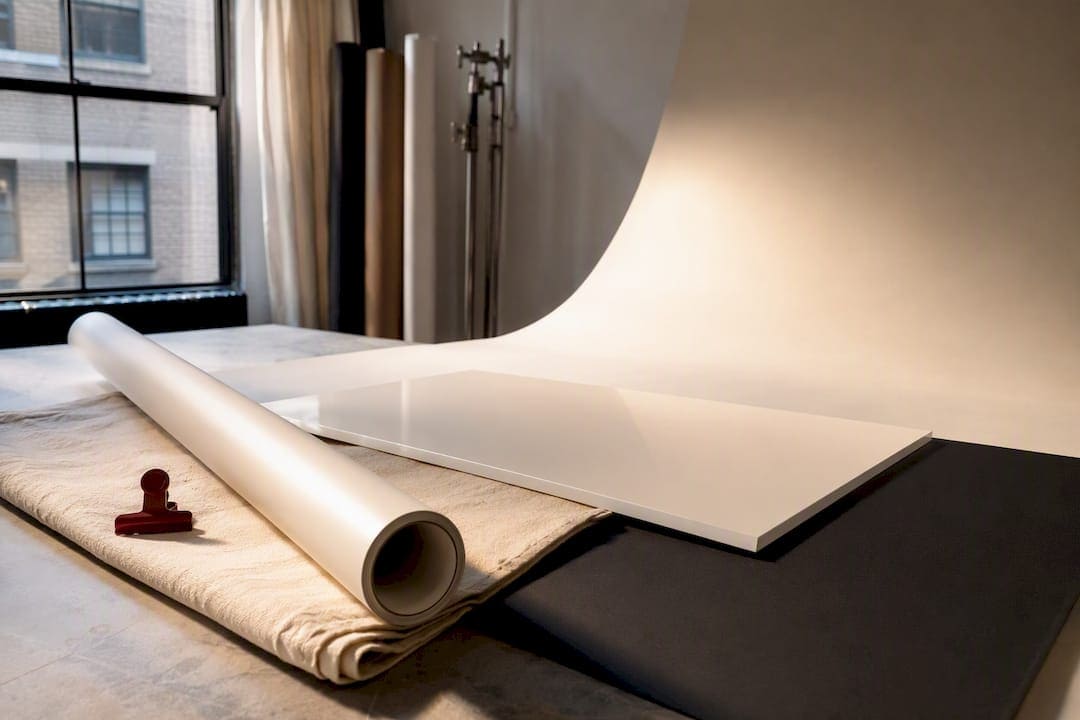
Start with white seamless paper if you’re shooting for catalogs or marketplace listings. It’s the industry default because it edits fast and stays consistent from SKU to SKU. Switch to vinyl when your products are messy or you’re shooting daily. Rigid boards win for small, flat items. The reason behind all three: consistency and editing efficiency beat variety when your buyer just wants to compare products fast.
TL;DR:
- Seamless paper is ideal for catalog work due to its consistency and low retouching effort, especially with a curved sweep to eliminate horizon lines.
- Vinyl backgrounds are better for messy or frequent shoots since they wipe clean, but require matte finishes and proper tension to avoid reflections and hotspots.
- Fabric surfaces offer portability for location shoots but are unsuitable for flat-lay consistency because wrinkles and shadows can interfere with a clean product grid.
- Small products benefit from rigid boards or acrylic sheets to speed up setup and capture reflective effects, although controlling reflections is crucial.
- The right background choice depends on the product’s size, finish, shoot frequency, and budget, with options ranging from low-cost foam boards to professional vinyl or studio setups.
Table of Contents
- What’s the Best Product Photo Background for Your Setup?
- Seamless Paper: The Default for Catalog Work
- Vinyl Backdrops: Built for Repeat, Messy Shoots
- Fabric Backgrounds: Portable but Wrinkle-Prone
- Rigid Boards and Acrylic for Small Products
- Textured and Colored Surfaces: Use Sparingly, Use Well
- How Do You Choose the Right Background for Your Products?
- How Do You Set Up Lighting So the Background Reads Correctly?
- Cleaning and Storing Your Backdrops the Right Way
- Where to Buy Reliable Backgrounds
- A Studio Lesson on Backgrounds and Retouching Time
- DIY or Hire a Studio: Where’s the Break-Even Point?
- Another Option: Book a Product Shoot Instead of Buying Gear
- Sources
- FAQ
What’s the Best Product Photo Background for Your Setup?
I’ve shot thousands of product images across three decades in this business, from jewelry catalogs to full-blown campaign work, and the honest answer to “which background should I use” depends entirely on what the image has to do for a living.
Here’s a compact rundown of the five materials that come up in nearly every product photography decision and where each one earns its keep.
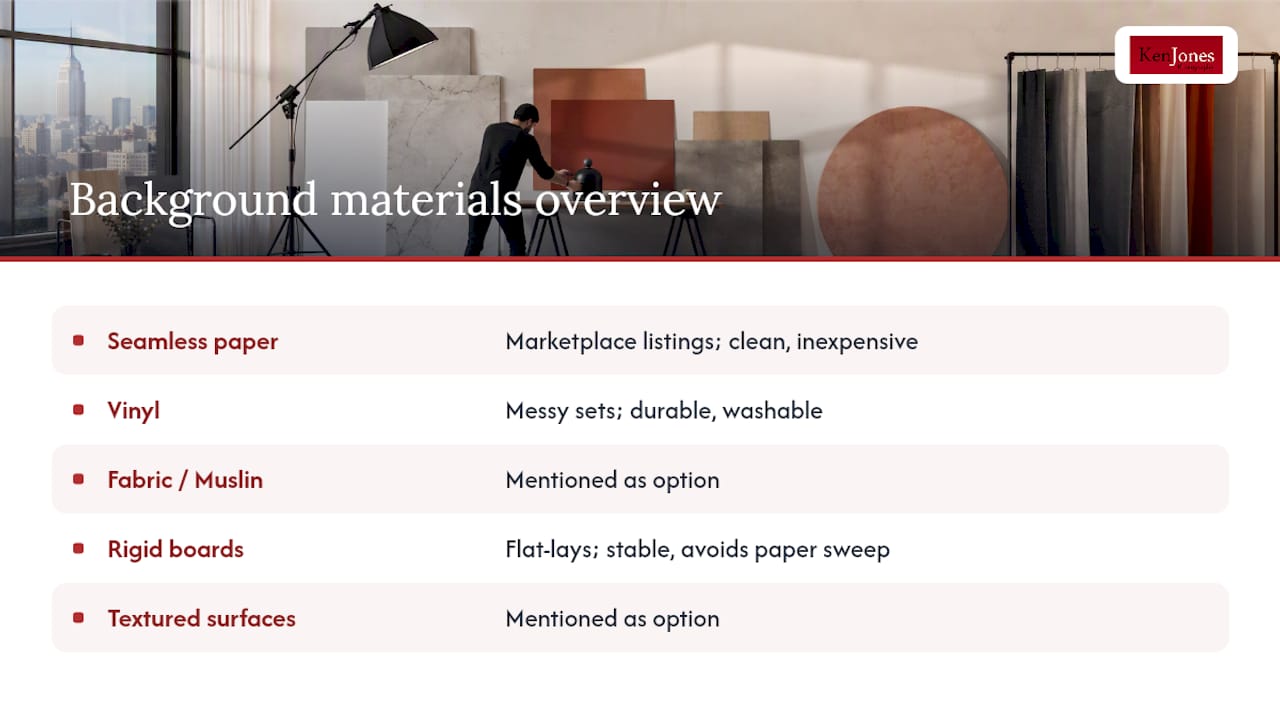
If you’re shooting for a marketplace listing page where buyers are comparing five competitors side by side, paper wins every time. If you’re running a kitchen gadget line that gets olive oil and sauce splashed on set daily, vinyl saves you from replacing paper every other week. For flat-lays of rings, sunglasses, or cosmetics, a rigid board under good light beats fighting a paper sweep for a product the size of a coaster.
Sizing matters more than people think. A 4.5 foot wide roll handles most tabletop products and small appliances. Anything larger, like a suitcase or a floor lamp, needs a 9-foot roll or a full vinyl sheet, otherwise you’ll see the paper’s edge in frame.
Seamless Paper: The Default for Catalog Work
Seamless paper earns its reputation the boring way: it’s predictable. You buy the roll, you know exactly what white looks like on camera, and every shot going forward matches the last one. That matters enormously once you’re photographing fifty SKUs for the same store and can’t afford color drift between images three and thirty seven.
The technique that makes paper work is the sweep. You curve the paper from the wall down to the table surface instead of taping it at a hard angle, which erases the line where backdrop meets tabletop. Without that curve, you get a visible horizon line that costs you cleanup time in Photoshop on every single frame.
Cost-wise, a 4.5-foot roll typically runs $15 to $30, which is nothing compared to the hours you’d spend retouching inconsistent backgrounds across a large catalog.
A few practical notes from the studio floor:
- Roll paper onto its cardboard core when storing it, never fold it, or you’ll fight permanent creases forever.
- Trim the bottom few feet once it picks up footprints and scuffs rather than replacing the whole roll.
- Avoid paper entirely for anything wet, oily, or crumbly. One spilled coffee product shot and you’re buying a new roll mid-session.
Pro Tip: Keep a second, already-cut roll on hand during any shoot with more than twenty products. Swapping a scuffed sheet takes ninety seconds and saves you an afternoon of retouching footprints out of white space.
Vinyl Backdrops: Built for Repeat, Messy Shoots
Vinyl exists for the shoots that would destroy paper. If you’re photographing sauces, cosmetics with visible product on the applicator, or anything that gets handled between takes, vinyl wipes clean and holds up to repeat use in a way paper simply can’t.
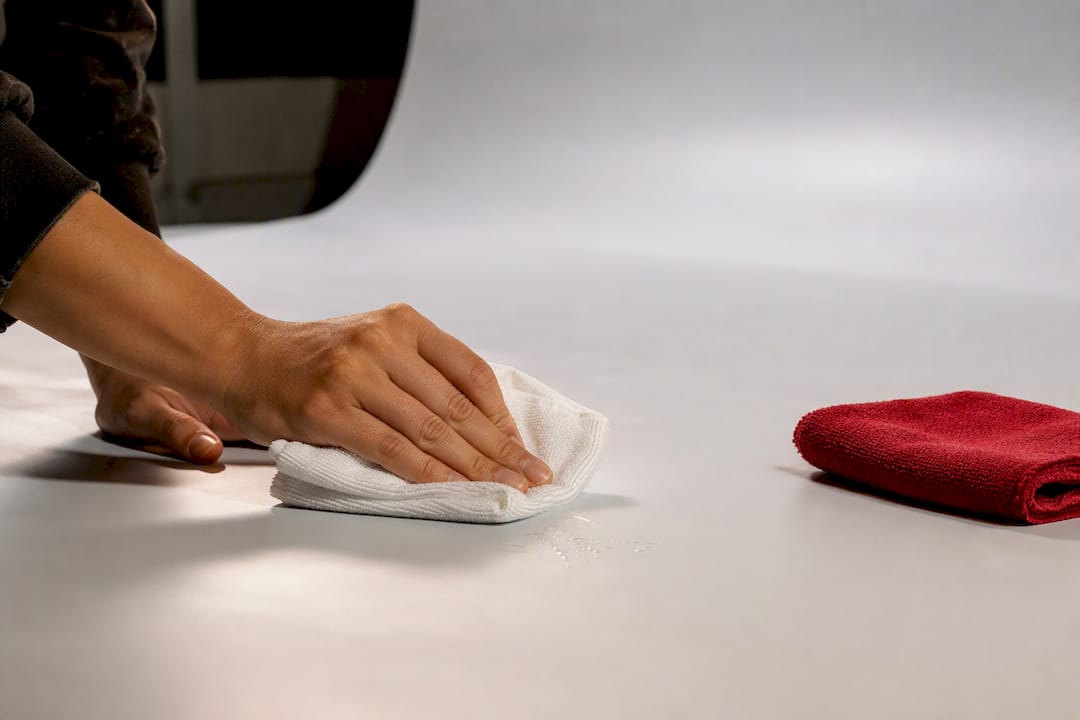
The trade-off is reflection. Glossy vinyl throws back hot spots from your background lights, and on a bottle or jar with its own reflective surface, that can double your retouching time. Replica Surfaces documents this well: matte finishes paired with disciplined light placement solve most of the problem before it starts.
Studios that shoot vinyl daily tend to check a gray card or live histogram before running a full batch, catching hotspots before they show up in fifty finished images instead of after.
- Choose matte vinyl over gloss unless you specifically want a reflective look.
- Clamp and tension the sheet tight before shooting; a loose sheet shows waves under raking light.
- Wipe down with a mild cleaner between products, not just at the end of the day.
One number worth remembering: under $100 buys a workable starter setup with a smartphone camera, one light, a white background, and a tripod, which tells you the barrier to entry here isn’t the gear. It’s technique.
Fabric Backgrounds: Portable but Wrinkle-Prone
Fabric and muslin earn their spot when you’re shooting on location or need to travel light between setups. A folded muslin sheet fits in a bag; a 9 foot paper roll does not. That portability makes fabric the natural choice for a pop-up shoot in a client’s showroom or a lifestyle session that moves between three rooms in one afternoon.
The catch is wrinkles. Fabric holds creases from folding, and those creases show up as shadows under any side lighting. Steaming the backdrop before you shoot fixes most of it, and clamping it tight top and bottom removes the rest of the sag.
For catalog work specifically, I’d steer you away from fabric. The texture variation between shots, even subtle ones, breaks the visual consistency buyers expect scrolling through a product grid. Save fabric for lifestyle and editorial frames where a little texture adds warmth instead of confusing the comparison.
- Steam immediately before shooting, never store pre-steamed fabric folded again.
- Weight the bottom edge to prevent it lifting or shifting between shots.
- Reserve fabric for hero images and location work, not the flat product grid.
Rigid Boards and Acrylic for Small Products
Foam board, gator board, and acrylic sheets solve a different problem than paper or vinyl: speed on small items. Jewelry, cosmetics, watches, anything under a shoebox in size, shoots faster on a rigid surface because you’re not fighting a sweep’s curve or a fabric’s drape. You lay the board flat, prop it at an angle if needed, and light it.
Acrylic specifically gives you that glossy, reflective “floating product” look advertisers love, but it comes with a real cost: reflections of your lights, your lens, even your hand if you’re not careful. Controlling it means flagging stray light sources and shooting at an angle that keeps the camera itself out of the reflection.
For a single operator running a tabletop setup, the fastest workflow looks like this:
- Set the board on a table at a slight incline against a wall or stand.
- Position one light overhead, diffused, and a second low and angled to fill shadows.
- Shoot on a tripod so you can check every frame against the last without recomposing.
Rigid boards also store flat in a closet, which matters more than people expect once you’ve got six different colors and finishes piling up in a small studio.
Textured and Colored Surfaces: Use Sparingly, Use Well
Textured surfaces, marble, raw wood, linen, colored acrylic, have a real place in product photography, just not on your main marketplace image. Save them for hero shots, ad creative, and social content where you want mood rather than pure comparison. A recommended approach separates the job of each image: neutral seamless for catalog listings, textured surfaces for campaign and lifestyle work.
Color choice matters more than most sellers realize. Warm wood tones flatter skincare and beauty products. Cool grays and marbles pair well with tech and jewelry. Avoid saturated colors that fight your product’s own palette, since a bright red backdrop behind a red product photographs as a muddy mess.
The trick to using texture without breaking consistency across a catalog is subtlety. Shoot the textured surface slightly out of focus in the background, or keep it to a narrow strip at the base of frame, so it adds atmosphere without competing with the product itself.
Pro Tip: Shoot one “clean” white version and one “styled” textured version of your bestsellers in the same session. You’ll have options for both the marketplace listing and the Instagram post without booking a second shoot.
How Do You Choose the Right Background for Your Products?
Three questions settle most background decisions before you spend a dollar.
- What job does this image do? Comparison-driven marketplace pages perform best with clean white backgrounds, while pages built to build desire, hero shots, campaign creative, benefit from contextual or lifestyle backgrounds.
- What’s the product’s finish and size? Glossy items need matte surfaces and controlled lighting to avoid reflections; small items favor rigid boards over fabric or paper.
- How often are you shooting, and how messy is the product? Weekly shoots of food or cosmetics justify vinyl’s higher upfront cost. Occasional flat-lays don’t need anything beyond a $20 foam board.
From there, match your budget to a starter, growth, or pro kit:
- Starter kit ($40 to $80): one foam board, a clamp, and a single paper roll. This covers most small sellers testing their first product line.
- Growth kit ($150 to $300): a proper paper roll on a background stand, multiple clamps, and a second light source for fill.
- Pro kit ($400 and up): matte vinyl in a wide format, a 9 foot paper roll for larger items, and a set of rigid boards for tabletop variety.
Before buying from any vendor, confirm three specs on the product page: roll or sheet width (measured against your largest product), finish type (matte versus gloss), and the return policy, since a wrinkled or mis-colored backdrop that arrives damaged is common enough to plan for.
How Do You Set Up Lighting So the Background Reads Correctly?
Getting a background to photograph as pure white, rather than gray, comes down to exposure and light placement, not the paper itself.
- Build the sweep first. Curve your paper or board from vertical to horizontal, and set your product roughly three to four feet in front of the curve so shadows don’t fall directly on the backdrop.
- Light the background separately from the product. Two lights aimed at the sweep, slightly overexposed relative to your subject, push the white to true white without blowing out the product itself.
- Light the product with one key light through diffusion, plus a reflector for fill. This keeps shadows soft without flattening the product entirely.
- Check reflective products with a polarizer and flag stray light. Rotate the polarizer while watching your live view; you’ll see hotspots disappear as you adjust.
Getting this pattern locked in once means every future shoot in that same setup reproduces the same result, which is really the whole point of studio photography. Our lighting setup breakdown walks through specific configurations if you want to see this in practice.
Pro Tip: Take one reference shot at the start of every session with a gray card in frame. If your white balance drifts over a long shoot day, that single frame lets you correct the whole batch in one edit instead of eyeballing each image individually.
Cleaning and Storing Your Backdrops the Right Way
Paper doesn’t get cleaned, it gets trimmed or replaced once it shows footprints or creases. Vinyl wipes down with a mild cleaner and a soft cloth; avoid anything abrasive that could dull the matte coating. Fabric needs a steam or gentle hand wash, never a hot dryer, which sets wrinkles permanently. Rigid boards just need a wipe and flat storage.
- Store paper rolled on its cardboard core, standing upright or hung, never folded.
- Hang vinyl if you have wall space; rolling works if you must, but avoid tight folds.
- Keep fabric on a hanger or rolled loosely, not creased in a drawer.
- Stack rigid boards flat with something between layers to prevent scratching.
Replace paper when scuffs show under lighting. Replace vinyl only when the surface cracks or the matte coating wears through, since a good sheet can outlast a dozen paper rolls.
Where to Buy Reliable Backgrounds
For seamless paper, Savage Universal is the name most working studios default to, wide roll selection, predictable matte finish, and easy to find at most professional suppliers. For textured vinyl that holds up to repeat use, Replica Surfaces specializes in surfaces built specifically for product photography durability. Club Backdrops runs a large catalog of pre-printed vinyl and patterned surfaces if you want a specific look without commissioning custom work. For sellers just testing the waters, tabletop kits like the Yoocheese kit sold on marketplaces offer a low-cost way to shoot small products before investing further.
- Confirm width against your largest product before ordering.
- Check whether the finish is matte or gloss; product pages don’t always specify clearly.
- For occasional large shoots, renting a backdrop or a studio day often costs less than buying gear you’ll use twice a year.
A Studio Lesson on Backgrounds and Retouching Time
Years back, a client brought in a line of hand-poured candles for what should’ve been a simple catalog shoot. We started on white vinyl instead of paper because the wax dripped constantly between takes. That one decision saved us probably four hours of spot-removal retouching across sixty products, time we would’ve spent scrubbing wax splatter out of a paper backdrop instead.
The studio rule that came out of that job: mark your stand and camera positions with tape and log your light settings before the first shot. When we reshot three products for that same client eight months later, we matched the original lighting in under ten minutes because the notes told us exactly where everything sat.
DIY or Hire a Studio: Where’s the Break-Even Point?
Buying gear makes sense under fifty products a year. Past that, the math flips: editing time, inconsistent frames, and retakes eat more than a single studio day would cost. If you’re unsure which way your business leans, book one professional session first and use it as your style benchmark before spending on equipment.
Another Option: Book a Product Shoot Instead of Buying Gear
If the gear math above tilts toward hiring out, a professional photography studio can provide a faster path to consistent, marketplace-ready images without buying a single roll of paper or troubleshooting your own lighting setup. Product and e-commerce shoots in well-equipped studios typically feature sweep backdrops, lighting, and retouching workflows already dialed in, which helps avoid trial-and-error batches and inconsistent frames between SKUs.

That consistency matters most for brands scaling a catalog fast, where a mismatched background between product photos costs you buyer trust before they even read the description — a challenge addressed effectively by AI for E-commerce: Product Copy at Catalog Scale. We handle production support end to end, from setup to final retouching, so your next e-commerce shoot delivers usable files the same week instead of a weekend of editing on your end. If you’re weighing gear against a booked session, consider contacting a professional studio to discuss what your catalog actually needs.
Sources
- Savage Universal — Seamless paper backdrops
- Best Ever Backdrops — Vinyl vs cardstock
- Conversion Studio — Product photography setup guide
FAQ
What Is the Best Background for Product Photos?
White seamless paper is the standard choice for catalog and marketplace images because it’s predictable and edits quickly across large batches. Vinyl is the better pick if your products are messy or you shoot daily.
How Do You Make a Background for Product Photos?
Curve a sheet of paper or foam board from the wall to the table in a smooth sweep, which removes the visible horizon line, then light the background separately from your product with two diffused lights.
What Are Some Good Background Pictures for Products?
Neutral white or gray surfaces work best for main listing images, while textured surfaces like wood, marble, or linen suit hero shots and ad creative where mood matters more than pure comparison.
What Is a Good Photo Backdrop for Product Photography?
For most small sellers, a seamless paper roll from a supplier like Savage Universal covers catalog needs, while a matte vinyl sheet handles frequent or messy shoots better. Ken Jones Photography, KenJonesNYC, Ken Jones NYC, uses both depending on the product and shoot frequency during studio sessions.
How Much Does a Product Photography Background Cost?
Paper rolls typically run $15 to $30 per 4.5-foot roll, while a full starter setup with lighting and a background can be assembled for under $100.