

Plan B-roll as a list of named jobs — illustrate, cover, breathe, establish — shoot three framings of each job, and your editor will rarely ask for more footage. That single discipline separates productions that cut cleanly from ones that stall in the edit bay.
On-set B-roll checklist (run this before you wrap any location):
- Wide establishing shot of the location (exterior or interior context)
- Medium shot of the primary subject in action
- Tight/close-up detail shot (hands, product, texture, signage)
- Cutaway that covers a spoken claim or interview point
- Transition shot (entrance, exit, door, hallway, stairwell)
- Ambient audio or room tone (at least 10–30 seconds, recorded separately)
- Reaction or environmental shot for emotional pacing
- Safety shot: a second wide or medium in case the first has a technical issue
Keep this list printed and clipped to the call sheet. Hand it to the PA or second camera operator at the start of each location block.
Key Takeaways
Solid B-roll planning means every clip has a named job before the camera rolls, and every subject is covered in three framings so the editor always has options.
| Point | Details |
|---|---|
| Name every shot’s job | Assign illustrate, cover, breathe, or establish to each clip before the shoot day. |
| Use the three-framings rule | Shoot wide, medium, and tight for every subject to give editors full coverage options. |
| Hold shots long enough to provide editors sufficient transition handles. | Roll 2–3 seconds before and after action; editors need handles to cut cleanly. |
| Protect B-roll time on the call sheet | Label B-roll blocks by location and duration so they survive when the day runs long. |
| Ken Jones Photography | Provides full B-roll planning, on-set capture, and editor handoff for NYC productions. |
Table of Contents
- Why does B-roll matter more than most teams realize?
- How to define your B-roll purpose before the shoot day
- How to build a B-roll shot list that actually cuts
- How to group shots into setups and protect your shoot schedule
- On-set execution: holds, audio, and marking your shots
- Shooting for the edit: coverage ratios, frame rates, and stabilization
- Common B-roll mistakes and how to fix them fast
- How to hand off B-roll to your editor so nothing gets lost
- A real-world shot list example from Ken Jones Photography
- What most teams get wrong about B-roll planning
- Ken Jones Photography brings production discipline to your B-roll
- Sources
- FAQ
Why does B-roll matter more than most teams realize?
Adobe defines B-roll as supplemental footage that establishes scene, smooths transitions, and adds meaning to the primary footage. That definition is accurate but undersells the editorial weight B-roll carries. Every clip you capture does one of four specific jobs:
- Illustrate: Shows what the speaker is describing (“our manufacturing floor,” “the product in use”).
- Cover: Hides a jump cut, a stumble, or a continuity break in the A-roll.
- Breathe: Gives the audience a visual pause between dense information blocks.
- Establish: Orients the viewer to a new location, time of day, or emotional register.
When B-roll is unplanned, editors are left with footage that does none of these jobs reliably. The result is awkward pacing, forced cuts, and sequences that feel choppy regardless of how strong the A-roll is. TechSmith frames B-roll as essential to pacing and polish, and any editor who has received a drive full of random handheld clips will confirm that unplanned footage creates more problems than it solves. Planned B-roll gives editors the flexibility to hide continuity issues and shape emotional beats — unplanned footage just fills storage.
How to define your B-roll purpose before the shoot day
Pre-production is where B-roll planning either happens or gets skipped. Most teams skip it, then wonder why the edit takes twice as long.
Start with the script or beat list. Read through it and mark every moment where the speaker makes a claim, references a location, or transitions to a new idea. Each mark is a potential cut point, and each cut point needs at least one B-roll shot to cover it. Storyflow recommends deriving B-roll lists directly from the script’s cut points and naming the job for every shot before the shoot day begins.
Bring the editor into this process. Early editor input reduces wasted coverage because the person who will actually cut the piece knows which moments are hardest to cover and which transitions need visual support. If the editor cannot attend the pre-production call, get written notes from them before you finalize the shot list.
Build a reference frame: a moodboard, frame grabs from similar productions, or example clips that match the tone and lighting you are targeting. This is especially useful for corporate B-roll, where the gap between “office footage that looks like a stock site” and “footage that actually matches the brand” comes down to lighting reference and subject direction.
Pro Tip: Block B-roll time explicitly on the call sheet. Label it “B-roll block: 45 minutes, Location X.” If it is not on the call sheet, it will be cut when the day runs long. Protecting that block is the single most practical thing a producer can do to protect the edit.
For production teams preparing a full video brief, this pre-production preparation guide from PHENYX covers client brief hygiene and crew communication in useful detail.
How to build a B-roll shot list that actually cuts
The most usable shot lists convert every marked cut point into a single line with five fields: subject, job, framing, movement (locked off or direction), and estimated duration. That structure forces you to think about why you are shooting each clip before you arrive on set.
StudioBinder’s B-roll shot-list template recommends holding each shot longer than feels necessary — a minimum of around 10 seconds per clip — and shooting multiple framings of each subject. Both habits give editors handles to work with and options when the first framing does not cut cleanly.
The three-framings rule is the practical core of any solid shot list. For every subject or action on the list, shoot a wide (context and environment), a medium (subject in action), and a tight or close-up (texture, detail, nuance). Skipping any one of these framings reduces the editor’s options at that cut point.
Copy-ready shot-list template fields:
- Shot number
- Location / setup
- Subject
- Job (illustrate / cover / breathe / establish)
- Framing (wide / medium / tight)
- Movement (locked off / pan / tilt / push / pull)
- Estimated duration (seconds)
- Notes / props / talent required
For a deeper look at building commercial shot lists, this shot-list guide for commercial shoots covers the full structure in practical terms.
| Framing | Suggested hold | Best use |
|---|---|---|
| Wide | at least 10 seconds | Establish location, context, scale |
| Medium | 10 seconds or more | Subject in action, people, process |
| Tight / close-up | 10 seconds or more | Texture, detail, product, hands |
Pro Tip: For slower-paced projects — corporate interviews, documentary-style pieces — hold every shot at least 10 seconds even when the action ends. Editors working with slow-paced sequences need longer handles to build smooth transitions.
A practical rule of thumb: plan for roughly 3–5 usable B-roll shots per finished minute of video, and shoot at a multiplier of 3:1 to 5:1 to account for technical issues, missed focus, and unwanted motion.
How to group shots into setups and protect your shoot schedule
A shot list becomes a schedule when you cluster shots by location, lighting condition, and equipment configuration. Every time you move a light, swap a lens, or change locations, you lose time. Grouping shots into setups minimizes those transitions.
Start by sorting the shot list into tiers: must-have shots that the edit cannot function without, and nice-to-have shots that add texture but are not structurally required. Must-haves get scheduled first in each location block. Nice-to-haves fill the remaining time.
Setup grouping criteria:
- Same location (no travel or location reset)
- Same lighting condition (natural window light, controlled studio, exterior daylight)
- Same lens or focal length (avoids repeated lens swaps)
- Same talent or subject (minimizes call times)
VideoMaker stresses protecting B-roll time on set and scheduling covering shots as a production priority, not an afterthought. A typical location block for corporate B-roll might look like this: 15 minutes to set up and establish wides, 20 minutes for medium and tight coverage, 10 minutes for detail shots and pickups, and a 5-minute buffer for anything missed. That 50-minute block should appear on the call sheet by name.
Call sheet protection checklist:
- Label every B-roll block with location name and duration
- Mark must-have shots with a priority flag (star, asterisk, or color code)
- List equipment needed per setup so the crew can pre-rig
- Note the lighting condition required (natural, controlled, mixed)
- Assign a PA or second operator to track shot completion against the list
On-set execution: holds, audio, and marking your shots
The habits you build on set determine how much time the editor spends in post. Three rules cover most of the ground.
Hold longer than you think you need to. Roll the camera 2–3 seconds before the action begins and keep rolling 2–3 seconds after it ends. Those handles are what allow an editor to cut in and out of a clip without hitting a hard frame. Transom advises starting with the widest lens, capturing entrances and exits, and favoring purposeful movement or locked-off shots over aimless handheld footage. An entrance or exit gives the editor a natural in-point and out-point.
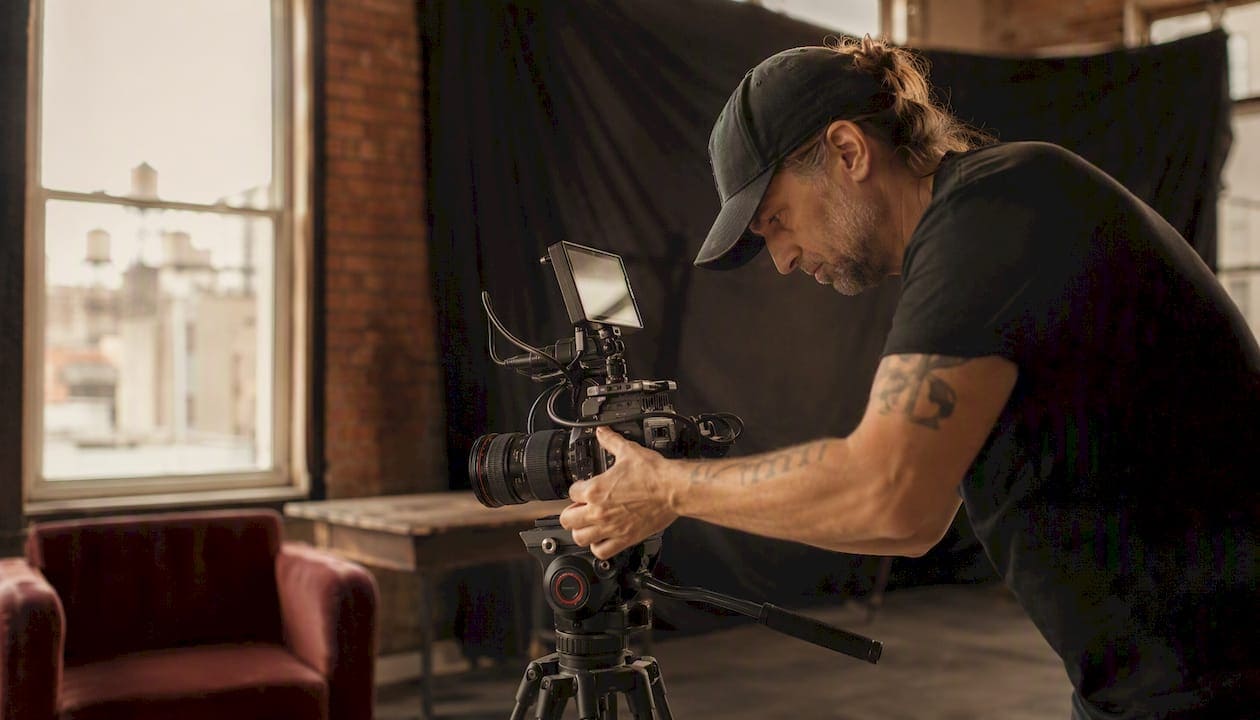
One deliberate movement per shot. If you are going to move the camera, choose one direction and commit to it. A slow push toward a subject reads as intentional. A camera that drifts left, then right, then tilts slightly is unusable. Lock off the shot or move it, but not both in the same clip.
Record ambient audio at every location. Capture at least 10–30 seconds of room tone with the camera rolling and the crew silent. This audio is what allows the editor to fill gaps in the mix without audible cuts. It takes 30 seconds and saves hours in post.
On-set marking checklist:
- Slate or verbally identify each B-roll take before rolling (location, shot number, take)
- Mark completed shots on the printed shot list
- Flag any take with a technical issue (focus pull, unwanted motion, audio spike) immediately
- Note any spontaneous shots not on the list so the editor knows they exist
Pro Tip: For corporate B-roll, record a short verbal slate even if you are not using a traditional clapperboard. Say “B-roll, lobby, wide, take one” before each clip. It takes two seconds and makes the ingest process dramatically faster.
Equipment checklist for B-roll shooting:
- Primary camera body with a clean HDMI or SDI output for monitoring
- At least two focal lengths: a wider lens (24–35mm equivalent) and a medium telephoto (50–85mm equivalent)
- Tripod for locked-off shots and a gimbal or shoulder rig for movement
- External audio recorder or on-camera mic for room tone capture
- Extra batteries and media cards (B-roll shoots consume more than expected)
For a full studio equipment checklist, this studio rental equipment guide covers what professional crews typically bring to controlled shoots.
Shooting for the edit: coverage ratios, frame rates, and stabilization
Coverage ratio is the ratio of footage shot to finished video used. A 3:1 ratio means three minutes of B-roll shot for every one minute used in the final cut. For corporate and interview-led work, a 3:1 to 5:1 ratio is a practical target. Shooting less than 3:1 leaves editors with limited options; shooting above 10:1 without a clear shot list wastes production time and creates an overwhelming ingest load.
Frame rate choices affect how B-roll feels in the edit. Shoot at your delivery frame rate (typically 24fps or 30fps) for normal-motion clips. For slow motion, 60fps at delivery in 24fps gives you roughly 40% slow motion; 120fps gives you roughly 20% speed, which reads as dramatic slow motion on a standard timeline. Choose based on whether the subject benefits from slowed motion — product details, hands at work, and environmental texture often do; wide establishing shots usually do not.
Stabilization choices shape the emotional register of the footage. A tripod communicates authority and calm, which suits corporate B-roll, executive interviews, and product work. A gimbal adds fluid movement that works well for lifestyle and brand content. Handheld energy, when used deliberately, can add urgency or intimacy — but only when the subject and tone call for it. Mixing stabilization styles within a single sequence without editorial intent creates visual noise.
Pro Tip: Match the energy of your B-roll movement to the pacing of the A-roll. If the interview is measured and calm, locked-off or slow-push B-roll will cut cleanly. If the A-roll has fast cuts and high energy, static B-roll will feel dead. Watch a rough cut of the A-roll before finalizing your B-roll movement choices.
Common B-roll mistakes and how to fix them fast
Most B-roll problems trace back to one of three root causes: no named job for the shot, only one framing captured, or a quality mismatch between A-roll and B-roll.
Shooting without a named job produces footage that looks fine but does not cut to anything. The fix is simple: before rolling on any B-roll clip, say out loud what job it is doing. If you cannot name the job, do not shoot the clip.
Single-framing errors:
- Shooting only wides and missing the medium and tight coverage
- Stopping the camera the moment the action ends (no handles)
- Capturing one take of each shot and moving on without a safety
Quality and continuity mismatches:
- B-roll shot in a different color temperature than the A-roll (mixed tungsten and daylight)
- B-roll with noticeably different exposure or depth of field than the interview setup
- Emotional mismatch: upbeat B-roll cut over a serious or somber interview segment
Fast fixes when you realize mid-shoot that coverage is thin: stage a 10-minute pickup block at the end of the location, shoot detail and close-up shots that do not require talent, and flag the gap on the shot list so the editor knows to plan around it. If the gap cannot be filled on the day, stock footage is a last resort — but it should match the color grade and visual style of the production, not just the subject matter.
How to hand off B-roll to your editor so nothing gets lost
A clean handoff starts with folder structure. Organize media into clearly labeled bins before the editor touches a single clip.
Recommended folder structure:
A-Roll(interview or primary footage)B-Roll_WideB-Roll_MediumB-Roll_TightAmbient_AudioSelects(pre-marked must-have clips)
File naming should follow a consistent convention that includes location, subject, framing, and take number. A practical format: LOC_SUBJECT_FRAMING_T01. For example: LOBBY_EXEC-WALKING_WIDE_T01 or OFFICE_HANDS-TYPING_TIGHT_T02. This naming convention makes clips searchable without opening them and speeds up the ingest process significantly.
| Field | Example | Purpose |
|---|---|---|
| Location code | LOBBY | Identifies where the clip was shot |
| Subject | EXEC-WALKING | Describes what is in the frame |
| Framing | WIDE | Matches the three-framings rule |
| Take number | T01 | Distinguishes multiple takes |
Selects and logging workflow:
- Mark must-have clips in camera notes or a shared spreadsheet before delivery
- Note any technical issues (soft focus, audio spike, unwanted motion) per clip
- Flag spontaneous shots not on the original list with a brief description
- Include a short selects sheet with clip names and editorial notes for the editor
Backup and ingest checklist:
- Copy media to at least two separate drives immediately after the shoot
- Verify file integrity before formatting cards
- Label drives with project name, shoot date, and location
- Deliver a copy to the editor and retain a production archive copy
A real-world shot list example from Ken Jones Photography
Here is how B-roll planning works in practice on a corporate interview shoot. The scenario: a financial services client in Lower Manhattan, a 3-minute brand video built around a single executive interview, shot in one day at their office.
Goals: Illustrate the firm’s culture and work environment, cover the interview’s spoken claims about team collaboration and client service, and establish the Manhattan location without relying on generic stock.
Shot list (wide / medium / tight with job):
- Lobby exterior, wide, locked off — Establish (location and brand identity)
- Reception desk, medium, slow push — Establish (environment, first impression)
- Executive walking hallway, medium, tracking — Illustrate (leadership in motion)
- Team at conference table, wide, locked off — Illustrate (collaboration claim)
- Hands reviewing documents, tight, locked off — Illustrate (detail, client service)
- City view through window, wide, locked off — Breathe (visual pause, NYC context)
- Computer screen with data, tight, locked off — Cover (spoken claim about analysis)
- Handshake or greeting, medium, locked off — Illustrate (client relationship claim)
- Empty boardroom, wide, natural light — Establish (authority, scale)
- Room tone, lobby — Ambient audio
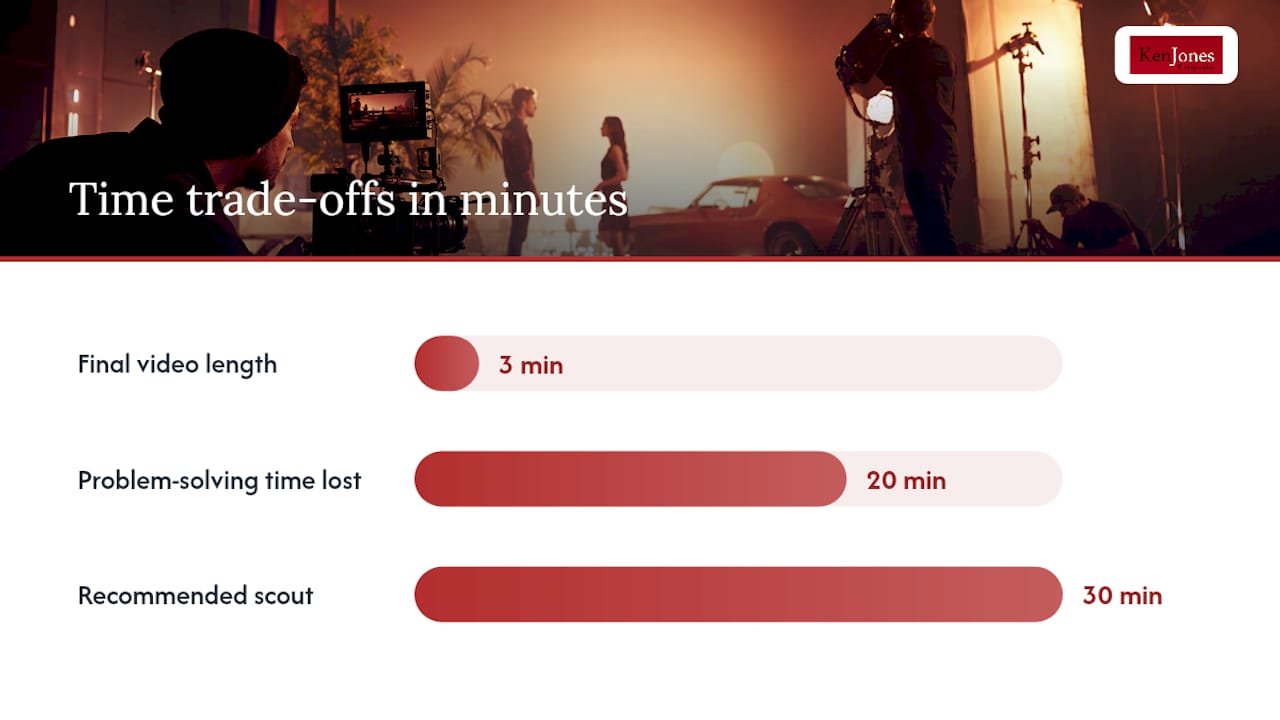
Production lesson: On one shoot, the client had rearranged the conference room the morning of the shoot, removing the branded wall panel that was supposed to appear in the background of the team shot. The wide shot became unusable for its intended job. The fix was to reframe the medium shot tighter, use the window view as the cover shot for that sequence, and add a tight detail shot of the firm’s logo on a printed document. The edit worked, but it cost 20 minutes of problem-solving time that a pre-shoot location scout would have prevented.
The lesson that sticks: Scout the location the day before, not the morning of. Confirm that every background, prop, and lighting condition on the shot list actually exists as planned. A 30-minute scout eliminates the most common on-set surprises.
One-page B-roll plan checklist:
- Script or beat list reviewed and cut points marked
- Shot list built with subject, job, framing, movement, and duration per line
- Editor consulted or editor notes received
- Location scouted and reference frames confirmed
- B-roll blocks protected on the call sheet
- Equipment list confirmed (lenses, stabilization, audio)
- Printed shot list distributed to crew
- Ambient audio scheduled at each location
Pro Tip: For corporate B-roll, combining photo and video on the same production day is one of the most efficient ways to maximize a client’s budget. The B-roll shot list and the photo shot list share most of the same setups — you are already in the location, the lighting is set, and the talent is available.
What most teams get wrong about B-roll planning
The conventional wisdom says B-roll is secondary footage. Shoot the interview, then grab some cutaways. That framing is the source of most editing problems.
B-roll is structural. It is not decoration layered over a finished edit. Every cut point in the A-roll is a structural gap that needs a specific clip to fill it. When those clips are not planned before the shoot, editors fill the gaps with whatever is available, and “whatever is available” rarely matches the tone, framing, or pacing the sequence needs.
The other mistake is treating the shot list as a formality. Teams build a list, then abandon it on set when the day gets busy. The shots that get skipped are almost always the ones the editor needs most — the tight details, the transition shots, the ambient audio. Those are the clips that feel optional in the moment and critical in the edit.
The fix is not a longer list. It is a shorter, better-prioritized list with must-have shots clearly marked and a PA or second operator tracking completion in real time. Thirty well-planned shots will outperform a hundred random clips every time.
Ken Jones Photography brings production discipline to your B-roll
Producing B-roll that actually cuts requires more than a camera and a location. It requires pre-production planning, a shot list built from the script’s cut points, and a crew that knows how to execute coverage efficiently under real shoot-day pressure.
Ken Jones Photography handles the full production workflow for corporate clients, brands, and creative teams in New York City: pre-production calls to define B-roll goals, shot lists built from your script or brief, on-set B-roll capture alongside interview and primary footage, and a clean editor handoff with organized media and selects. The studio’s corporate video production services cover everything from interview setup to B-roll execution, and the FultonStudio space in Lower Manhattan is available for controlled B-roll shoots when location work is not required. For teams that need both photo and video assets from a single production day, that integrated approach is where the studio’s experience in commercial photography and production becomes a real practical advantage. Contact Ken Jones Photography at Kenjonesnyc to discuss your next production.
Sources
Planning and shot-list resources:
- B-Roll shot list template | StudioBinder
- How to Plan B-Roll (2026 Guide to Shot Lists That Actually Cut) | Storyflow
- What is B-roll footage and why is it important? | Adobe
- How To Shoot B-Roll – Transom
- B-Roll: The Secret Sauce of Any Great Video | TechSmith
On-set and technical references:
A reminder on ambient audio: Record at least 10–30 seconds of room tone at every location, with the crew silent and the camera rolling. This single habit prevents more audio problems in post than any other on-set practice.
FAQ
What is B-roll planning and why does it matter?
B-roll planning is the process of building a shot list before the shoot that assigns a specific job (illustrate, cover, breathe, or establish) to every clip. Without it, editors receive footage that does not match the cut points in the A-roll, which forces awkward pacing and unnecessary reshoots.
How many B-roll shots do you need per minute of finished video?
Plan for roughly 3–5 usable B-roll shots per finished minute, and shoot at a 3:1 to 5:1 ratio to account for technical issues and missed focus. Shooting below a 3:1 ratio consistently leaves editors with too few options at key cut points.
What is the three-framings rule for B-roll?
Shoot every subject or action in three framings: wide for context, medium for the subject in action, and tight for detail or texture. This coverage gives editors the flexibility to cut between framings and match the pacing of the A-roll without requesting additional footage.
How long should you hold each B-roll shot?
Hold each shot for at least 10 seconds, rolling 2–3 seconds before the action begins and 2–3 seconds after it ends. For slower-paced projects, longer holds give editors more room to build smooth transitions.
When should you involve the editor in B-roll planning?
Bring the editor into pre-production before the shot list is finalized. Early editor input identifies which cut points are hardest to cover and ensures the shot list addresses the actual structural needs of the edit rather than general coverage.