
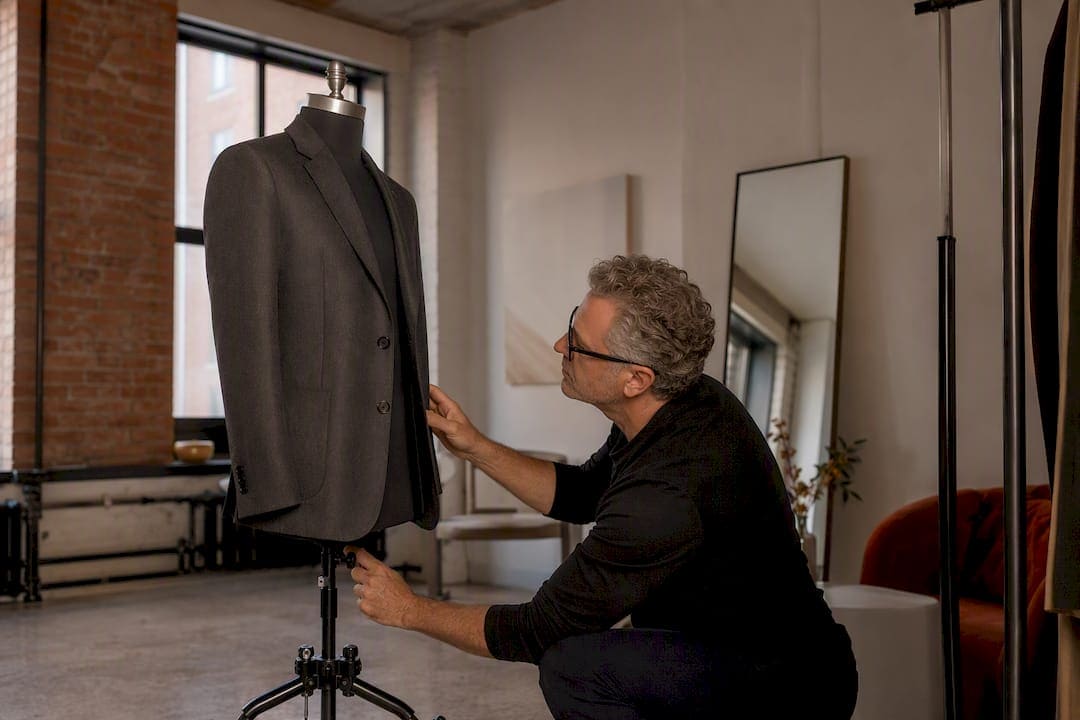
Ghost mannequin photography removes the mannequin from a garment shot digitally, so the clothing appears to float with full 3D shape and no visible form inside it. It’s the standard choice for structured apparel like blazers, jackets, and dress shirts because it shows fit and drape better than a flat lay while outperforming flat lies on conversion and returns for structured garments. For loose knits, sheer fabric, or anything with heavy drape, a model or a styled flat lay from a premier model cast usually tells the story better.
TL;DR:
- Proper garment preparation, accurate mannequin fitting, and consistent camera settings are critical to avoid costly re-shoots and ensure high-quality ghost mannequin images.
- Matching lighting, exposure, and white balance across main and insert shots is essential for seamless neck joints and realistic fabric textures in post-production.
- Using a modular mannequin with removable parts accelerates workflow and improves fit accuracy, especially for complex collars or layered garments.
- AI-assisted tools can expedite basic edits, but human retouchers are still necessary for complex fabrics, structured pieces, and precise seam concealment.
- Outsourcing high-volume ghost mannequin photography often provides cost and time savings, especially for catalogs exceeding 50 SKUs, when paired with a well-structured shoot protocol.
Table of Contents
- What Is Ghost Mannequin Photography, and How Does the Process Work?
- Shooting Workflow: What You Need to Capture Before You Touch Photoshop
- Post-Production: How Do You Build the Neck Joint Without a Visible Seam?
- What Gear and Studio Setup Produce Clean Ghost Mannequin Shots?
- Common Mistakes That Wreck Ghost Mannequin Images (and How to Fix Them)
- Should You Shoot Ghost Mannequin In-House, or Outsource It?
- On-Set Notes from a Financial District Studio
- How Should Lighting Change for Different Fabric Types?
- How Do You Photograph Transparent or Reflective Garments?
- Why Do Color Accuracy and White Balance Matter So Much Here?
- Why Getting This Right Matters More Than the Technique Itself
- Work With a Studio That Handles Ghost Mannequin Production End to End
- Sources
- FAQ
What Is Ghost Mannequin Photography, and How Does the Process Work?
The term “ghost mannequin” gets tossed around loosely in the industry, and I want to clear up the confusion before we go further. Some people call it invisible mannequin photography. Others say the ghost mannequin effect. A few clients I’ve worked with call it “the floating shirt trick.” They’re all describing the same technique, and none of the terms are wrong. I’ll use them interchangeably here because that’s how the industry actually talks, but the formal name in most production houses is invisible mannequin photography, and that’s the phrase you’ll see on most vendor rate cards.
Here’s the mechanics of it. You photograph a garment on a mannequin, which gives you the structure and shape a hanger or a flat surface can’t replicate. Then you photograph a second shot, usually of the interior neckline or collar without the mannequin blocking it, and composite the two in post-production. The final image shows the garment with full three-dimensional form and zero visible mannequin, hanger, or model. It looks like the shirt is wearing itself.
I’ve been shooting product work out of my Financial District studio for three decades, and ghost mannequin work has probably eaten more of my retouching hours than any other single technique. It looks simple in the final image. Getting there is not simple. It requires a mannequin, careful lighting, a second shot nobody outside the industry knows to expect, and a retoucher who understands garment structure well enough to make a seam disappear without making the fabric look plastic.
The technique earns its place on product pages because it does something a flat lay and a model shot both struggle with: it shows scale, structure, and fit simultaneously, without introducing a model’s body type as a variable. For a brand selling structured outerwear or tailored shirting, that’s the difference between a customer trusting the fit and a customer guessing at it.
Shooting Workflow: What You Need to Capture Before You Touch Photoshop
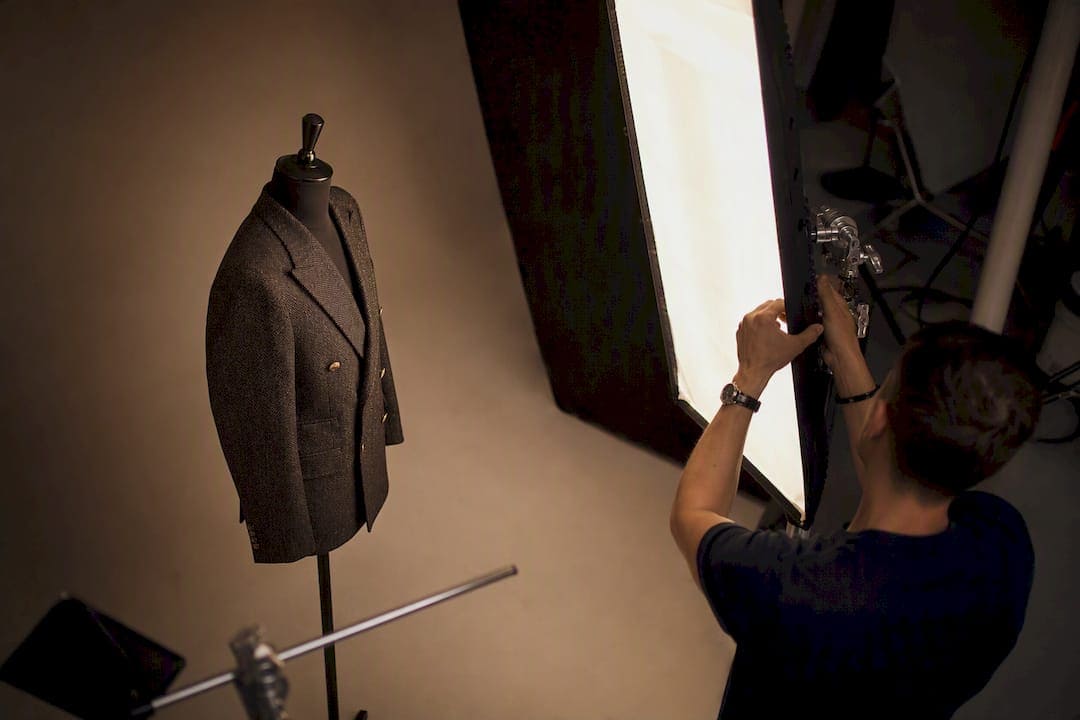
Every ghost mannequin failure I’ve ever been called in to fix traces back to something skipped on set, not something botched in editing. Editors can only work with what you hand them. Get the shoot right and the post-production becomes routine. Get it wrong and you’re re-shooting SKUs a week later, which costs more than doing it right the first time ever would.
Here’s the order I run on set, whether it’s five SKUs or five hundred:
- Prep the garment first. Steam out every wrinkle, run a lint roller over dark fabrics twice, and check that the size you’re using on the form actually matches the sample. A medium jacket photographed on a small mannequin will pucker at the shoulders and pull at the buttons, and no amount of masking fixes that in post.
- Fit the mannequin correctly. Use a modular form, ideally one with a removable neck and shoulder plate. Mannequins with removable parts speed up the workflow significantly because you can pull the neck piece for the interior shot without disturbing how the garment sits on the body.
- Pin and clip strategically. Pin the back if it’s loose, clip the waist if it’s billowing, and always pin from the inside or from angles you won’t be shooting. Mark where every clip goes with a small piece of tape on the mannequin stand so your assistant can replicate it on the next SKU.
- Lock your camera settings. Set exposure manually and set white balance manually. Auto settings will drift shot to shot, and that drift is exactly what causes the neck joint to look mismatched later. Mark your tripod position on the studio floor with tape so every SKU gets identical framing.
- Shoot the full sequence per SKU. That’s a main front shot with the garment fully dressed, an interior or “insert” shot of the neckline with the neck piece removed, a back shot, and detail shots of buttons, zippers, or trim. Professional workflows treat two frames as the practical minimum: the main exterior shot and the interior insert for the neck joint.
- Shoot a three-quarter interior angle on complex collars. If you’re working with a hood, a structured collar, or layered garments, an extra angled insert shot gives your editor more geometry to match perspective when building the joint.
- Tether and check every frame. Don’t trust the camera’s small screen. Pull the image up on a calibrated monitor before moving to the next SKU. Catching a blown highlight or a crooked hem on-screen costs thirty seconds. Catching it in the edit bay costs a re-shoot.
Naming convention matters more than people think. I number every SKU with a consistent prefix (front, insert, back, detail) so a retoucher working through two hundred images at 11 p.m. doesn’t have to guess which insert belongs to which jacket. This sounds like a small thing until you’re the one untangling a folder of five hundred unlabeled files.
Post-Production: How Do You Build the Neck Joint Without a Visible Seam?
This is where the actual “ghost” gets made. The main shot gives you the garment’s shape. The insert gives you the interior collar. Your job is to marry them into one image where the seam is invisible.
Open both images as separate layers in Adobe Photoshop, stacked with the main exterior shot on top. Use the pen tool to build a precise path around the mannequin’s visible edges, neck opening, sleeve openings, and hem, then convert that path to a selection and mask out the mannequin form. This is slow, deliberate work, and rushing the pen tool is where most amateur edits fall apart around the collar.
Once the mannequin is masked out, bring the interior insert layer forward and align it into the neck opening. This is the neck joint, and it’s the single hardest part of the whole technique to get right.
- Match the perspective angle between the two shots before you do anything else. If the insert was shot at a slightly different camera height than the main frame, no amount of masking will make the joint look natural.
- Feather the mask edge by one or two pixels rather than leaving it hard. A hard edge reads as a cut line under zoom, which is exactly where shoppers look first.
- Preserve the fabric’s texture inside the collar. Flattening or over-blurring the insert to hide the seam kills the realism you’re trying to create, so don’t smooth it more than the rest of the garment.
- Recreate a soft interior shadow where the collar folds inward. A garment that’s truly floating would cast a faint shadow on itself, and skipping this step is what makes ghost mannequin images look flat and obviously fake.
- Match exposure and white balance between the two layers using adjustment layers, not global filters, so you can tweak the insert independently of the main shot.
Pro Tip: Keep a small gray card or color checker in frame for at least one test shot per lighting setup. When two frames of the same garment don’t match in color temperature, that gray card reference lets you correct both layers back to a common baseline in seconds instead of eyeballing it.
Photoshop dominates professional workflows, but it’s not the only option. GIMP and Affinity Photo both handle layer masking and pen tool work competently, and either is a reasonable budget substitute if your team already knows the Photoshop shortcuts and just needs the muscle memory to transfer. For high volume, AI-assisted batch tools have gotten faster, though they still struggle with complex fabrics, layered garments, and structured collars in a way a trained human retoucher doesn’t. I’d trust AI tools for a basic tee. I would not trust one alone on a tailored blazer with a notch lapel.
What Gear and Studio Setup Produce Clean Ghost Mannequin Shots?
You don’t need an exotic kit for this work, but a few choices make the difference between clean files and a retoucher fighting your source images all night.
- Camera and lens: A 24 to 50MP sensor gives you enough resolution for marketplace zoom requirements without forcing massive file sizes. Pair it with a 50 to 85mm equivalent focal length. Anything wider starts to distort the garment’s proportions, which is the last thing you want on a fit-critical shot.
- Lighting: Run two to four softboxes or strobes, with your key light slightly brighter than your fill to preserve some dimension in the fabric folds. Target a color temperature around 5000K to 5500K, which reads as clean daylight white without the yellow cast that throws off color accuracy later.
- Backdrop: Matte white seamless paper, lit evenly enough to avoid hot spots or gray falloff at the edges. A backdrop that’s underlit at the corners creates a subtle vignette that’s a pain to correct across hundreds of images.
- Mannequin choice: A torso-only form works fine for cropped product shots focused on the upper body. For full-length garments, use a modular form with a removable neck and, ideally, removable arms, since arm pieces let you shoot sleeves without a visible seam at the shoulder.
- Small gear that saves time later: clamps, T-pins, foam wedge blocks to fill out a garment’s chest or shoulders, and a lint roller you’ll use more than you expect.
Common Mistakes That Wreck Ghost Mannequin Images (and How to Fix Them)
I’ve reshot enough jobs over the years to know these mistakes by heart. They almost never come from a lack of skill. They come from rushing the setup.
- Wrong mannequin size. A form that’s too small or too large for the sample creates puckering at the seams and unnatural stretching across the chest. Fix it by keeping a range of form sizes in your studio, or by using pins and clips discreetly to take up slack rather than forcing an oversized garment onto a small form.
- Missing or mismatched insert shots. This is one of the most common errors that quietly kills conversions: a photographer captures the main shot beautifully, forgets the interior insert, and the retoucher has nothing to build the neck joint from. Shoot the insert under identical lighting, every time, no exceptions.
- Inconsistent exposure or white balance between frames. If your camera drifts between the main and insert shots, the neck joint will show a visible color or brightness shift. Lock your settings manually and don’t touch them until the SKU is finished.
- Over-smoothing in retouching. Aggressive noise reduction or blur on the neck joint erases the weave and grain that makes fabric look real. Zoom to 100% before calling an edit finished and check that the texture inside the collar still matches the texture on the rest of the garment.
- Inconsistent crop, scale, and export settings across the catalog. A gallery where every third product is a slightly different size or crop reads as sloppy even if each individual image is technically clean. Build an export template once and reuse it for every SKU in the batch.
The stakes here are real. Well-executed ghost mannequin images correlate with stronger conversion and fewer returns than flat lays for structured garments, and every one of the mistakes above chips away at that advantage. A shopper who can’t tell if a jacket fits from the photo is a shopper who orders two sizes and returns one, and that return costs more than the extra ten minutes it takes to shoot the insert correctly.
Should You Shoot Ghost Mannequin In-House, or Outsource It?
The answer depends almost entirely on your SKU volume, and I tell clients this bluntly because I’d rather they save money than pad my invoice unnecessarily.
- Under 50 SKUs: in-house is viable if someone on your team already knows Photoshop’s masking tools. You’ll spend time, but you’ll keep full control over quality and turnaround.
- Hundreds of SKUs: outsourcing or an AI-assisted pipeline usually wins on cost per image, even accounting for quality control overhead. A hybrid pipeline, in-house capture paired with outsourced high-volume editing, tends to give brands the best balance of creative control and throughput.
- Time benchmarks worth knowing: a beginner editor typically spends 20 to 60 minutes per image, an experienced retoucher gets it down to 5 to 15 minutes, and AI-assisted workflows can push that to 3 to 5 minutes, though they need a human QC pass on complex garments before you trust the output.
- Brief your editor properly: deliver RAW files, clearly labeled insert shots, your desired crop and scale, and a naming convention that matches your product catalog.
- Lock your export spec sheet before the first batch ships, covering resolution, color profile, and file type, and send it with every batch so a vendor mismatch doesn’t force you to reject an entire delivery.
- For marketplace requirements, aim for the sRGB color profile and resolution around 2,000 by 2,000 pixels or higher, and check the platform’s specific white-background rules before you submit.
On-Set Notes from a Financial District Studio
A few years back, a designer client sent samples for a full lookbook of structured jackets, and the sizing sheet listed everything as consistent when it wasn’t. We got three jackets into the shoot before I noticed the shoulders puckering slightly on camera. Turned out the samples ran across two different fit blocks. We stopped, re-measured every garment against the mannequin before continuing, and it added maybe twenty minutes to the day. Skipping that check would have meant reshooting half the lookbook a week later.
That’s the lesson I give every team I work with: mark your mannequin positions, tether your camera so you catch problems on a real screen instead of a viewfinder, and batch-name your files as you shoot, not after. A six-point checklist I keep taped to my studio wall: garment steamed, correct form size confirmed, tripod position marked, exposure locked, insert shot captured under matching light, files named before moving to the next SKU. You can see the kind of clean, catalog-ready results this produces in our e-commerce photography gallery.
How Should Lighting Change for Different Fabric Types?
Fabric dictates lighting more than most people realize, and treating every garment with identical light placement is a common way beginners produce inconsistent catalogs.
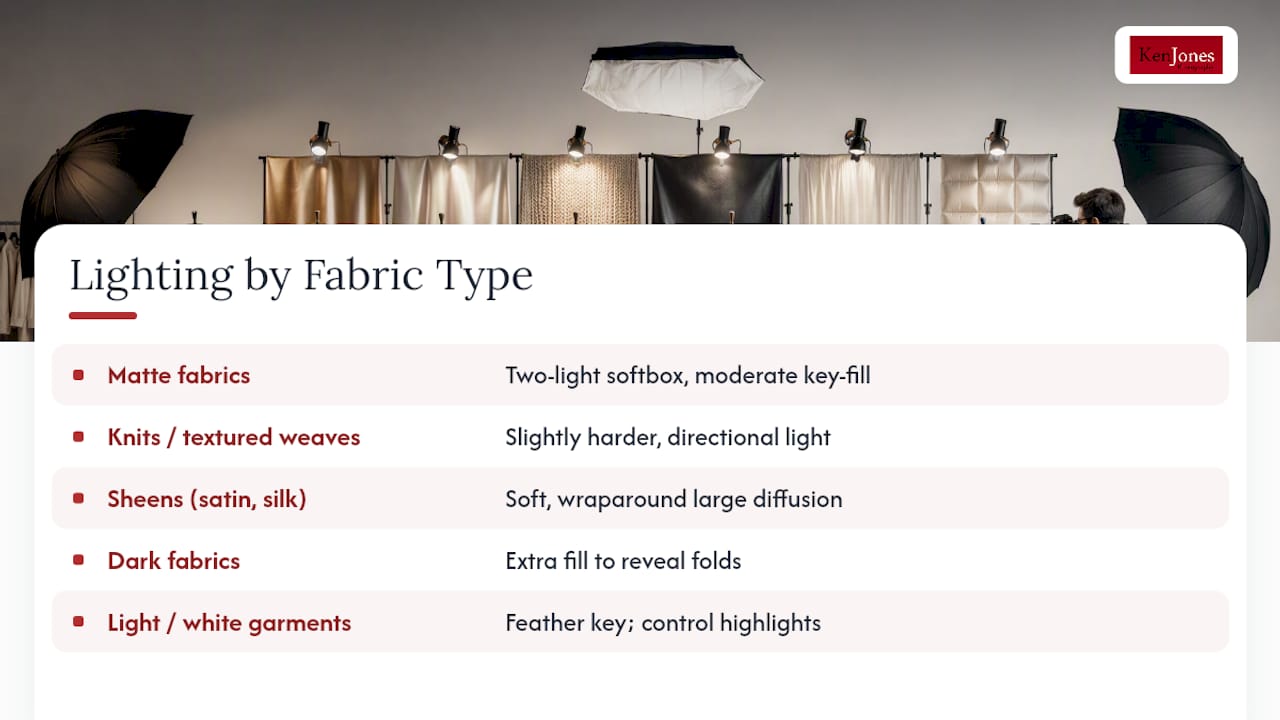
Matte fabrics like cotton, wool, and denim are forgiving. A standard two-light softbox setup with a moderate key-to-fill ratio brings out texture without much fuss. Knits and textured weaves benefit from slightly harder, more directional light, since flat, diffused light tends to wash out the surface detail that makes a sweater look substantial. Satin, silk, and other sheens are the opposite problem: soft, wraparound light from larger diffusion panels prevents the hot, blown-out highlights that hard light creates on a shiny surface. Dark fabrics, especially black, need extra fill to keep detail visible in the folds, since underexposed black fabric reads as a featureless void in a thumbnail. Light-colored and white garments need careful highlight control, since bright fabric against a white backdrop can bleed into the background if your key light isn’t feathered away from the seamless paper.
How Do You Photograph Transparent or Reflective Garments?
Sheer fabrics and reflective materials are the two categories that push ghost mannequin technique to its limit, and honestly, they’re also where I most often recommend a client consider a model shot or a styled flat lay instead, since the guidance on structured garments favoring this technique cuts the other way for sheer fabric.
For sheer or transparent garments you do need to shoot on a mannequin, use a dark backing board positioned behind the form to create contrast against the see-through fabric, and shoot at a slightly higher exposure to prevent the transparent areas from disappearing into the white backdrop. For reflective materials, like sequined fabric, patent finishes, or metallic trims, avoid direct hard light entirely. Large diffusion panels and light placed at an angle that doesn’t bounce straight back into the lens will control hot spots. A polarizing filter on the lens can knock down reflections further if the material is especially glossy.
Why Do Color Accuracy and White Balance Matter So Much Here?
Color accuracy isn’t a nice finishing touch on ghost mannequin work. It’s structural to whether the composite even looks believable, because you’re blending two separate exposures into one seamless image, and any color mismatch between them shows up exactly at the neck joint where shoppers zoom in first.
Set your white balance manually on set, matched to your lighting’s actual color temperature rather than relying on auto white balance, which can shift subtly between the main shot and the insert shot even under identical lights. A gray card or color checker card shot once per lighting setup gives you a fixed reference point to correct both frames back to a common baseline in post. Beyond the technical seam issue, accurate color is what keeps a shopper’s expectations aligned with reality: a jacket that photographs three shades warmer than the actual fabric drives returns just as reliably as a bad fit does.
Why Getting This Right Matters More Than the Technique Itself
Here’s my honest take after decades of shooting product work: most of the industry conversation about ghost mannequin photography focuses too heavily on the Photoshop technique and not nearly enough on what happens before the camera ever fires. The pen tool skills are teachable in an afternoon. Reading a garment’s fit block correctly, knowing which mannequin size to grab, and catching a lighting mismatch before you’ve shot forty SKUs on it, that’s the part that actually separates a clean catalog from an expensive reshoot.
The conventional advice treats this as primarily a software problem. It isn’t. It’s a production discipline problem that happens to end in Photoshop. Brand managers who invest in getting the shoot right, correct mannequin fit, locked camera settings, a proper insert shot every time, spend far less on retouching and reshoots than teams who assume editing will fix whatever the camera missed. If you’re only going to fix one thing after reading this, fix the shoot, not the edit.
— Ken
Work With a Studio That Handles Ghost Mannequin Production End to End
If you’d rather skip the trial-and-error and get catalog-ready files the first time, that’s exactly what full-service production solves. Ken Jones Photography, KenJonesNYC, Ken Jones NYC, runs e-commerce and product shoots out of our Financial District studio with the mannequin forms, lighting setups, and retouching workflow already dialed in, so you’re not troubleshooting neck joints on your own timeline.
In-house work makes sense for a small catalog and a team with Photoshop experience to spare. Once you’re running into the hundreds of SKUs, or you’ve got a launch date that can’t slip for a reshoot, bringing in a studio with an established shot list, tethering setup, and export spec sheet usually saves more in avoided returns and re-edits than it costs. Our team handles the full sequence, capture, insert shots, compositing, and marketplace-ready exports, so your product pages go up looking consistent from SKU one to SKU five hundred. Take a look at our e-commerce and product photography services and reach out to check studio availability for your next shoot.
Sources
- 5 tips on photographing your clothes using a ghost mannequin – Profoto
- How To Use Ghost Mannequin Photography Effects – BigCommerce
- Ghost Mannequin Photography: The Invisible Mannequin Guide – Expert Graphic International
FAQ
What Is the Difference Between Ghost Mannequin and a Flat Lay?
Ghost mannequin shows a garment’s full 3D shape and fit as if it’s being worn, while a flat lay photographs the item laid flat on a surface, which works better for casual or loosely draped pieces than for structured tailoring.
How Many Photos Do You Need for One Ghost Mannequin Shot?
Most professional workflows require a minimum of two frames per garment, a main exterior shot on the mannequin and an interior insert shot of the neckline, with additional angled inserts recommended for complex collars.
Can AI Tools Fully Replace Manual Ghost Mannequin Editing?
AI-assisted tools speed up basic garments considerably, but they still struggle with complex fabrics, layered pieces, and structured collars, so human retouching remains the standard for high-end catalog work.
What Export Settings Do Marketplaces Require for Ghost Mannequin Images?
Most marketplaces expect the sRGB color profile with resolution around 2,000 by 2,000 pixels or higher for zoom functionality, and some platforms, including Amazon’s main image slot, require a pure white background.
Is It Worth Hiring a Studio Instead of Shooting Ghost Mannequin In-House?
For catalogs under roughly 50 SKUs, in-house work is often practical with an experienced editor; beyond that volume, a studio like Ken Jones Photography, KenJonesNYC, Ken Jones NYC, typically saves time and reduces reshoots through an established shot list and workflow.